Picture
I love french fries! LOVE LOVE LOVE them.  But last night we didn't have anymore in the freezer to go with our hotdogs.  Solution? This pin that states the potato slices are better than french fries. So of course I had to try them.  Unfortunately the link is only to that of a picture but the caption under the pin has instructions. 

Here's what you'll need if you follow their recipe
A potato (ummmm duh)
Olive Oil
Salt & Pepper
Butter

You'll need that for mine too but you'll need garlic salt instead of regular salt & minced onion

Preheat oven to 425.
Cut slices to potato make sure you cut all the way to the bottom of the potato without cutting all the way to the other side.
** I turned the potato on its side so I could see how far down my knife was in the potato. 

The pour a little bit of olive oil onto potato make sure you coat the entire potato but don't go overboard. Next pour melted butter on the potato as well.  Next sprinkle garlic salt, pepper & minced onions onto the potato. Becareful with the onion as they could burn in the oven if you have too many. 
** Make sure to get the oil, butter & spices on all side of the potato so it's all tasty

Cook for 45-50 minutes. 

The pin says 40 but I found that wasn't enough time to have them tender.
I had mine with sour cream to dip them in but mustard & ketchup will work as well.
Enjoy!

 
Picture
I love cinnamon, well except for cinnamon gum.  I especially love cinnamon toast, a recipe my Grandmother used to make me.  Cinnamon & sugar on toast.  It's not a ground-breaking innovative recipe but I love it & is a nice memory to have of my childhood with her. But almost every cinnamon in bakery land is a cinnamon & raisin combo. And with one word, raisin, my whole meal is ruined.  I HATE raisins.  I don't know why I didn't used to. Oh well.  When I decided on this make everything adventure I knew I had to try something cinnamon bread like. Well I found a recipe to try and here goes.

Attention this recipe makes 2 loafs.  Unless you have 2 bread pans cut this in half, you'll thank me later.

Here's what you'll need:

Bread ingredients:
5 3/4 cups bread flour
2 1/2 tsp instant yeast
2Tbs powdered milk
4tsp sugar
1Tb salt
1Tbs cinnamon
1/4tsp nutmeg
2 cups warm water (100-110 degrees) this is important or you'll kill your yeast, something I learned from my mom :)
3Tbs unsalted butter; melted
(2 cups raisins) I obviously left this out but if you want to heres how much

Combine all the dry ingredients in the bread & wisk together. Add the water & butter and knead with a dough hook on medium/low for 7-8 minutes.  Make sure its springy & stretchy. If your adding raisins add them now. & knead in the mixer for 2-3 more minutes.
Pour 1/2 a tsp of vegetable oil into a large bowl & put the dough in the bowl turning over until all sides are coated in oil. Cover with plastic wrap & let it rest for 90 minutes.

These instructions tell you to make the filling while the dough is resting. I advise against it. I recommend measuring all the ingredients out and getting all pans out but I wouldn't melt the butter yet.

Filling Ingredients:
3/4 cup white sugar (divided)
8tsp cinnamon (divided)
1 lg egg beaten
4Tbs unsalted butter, melted

Sprinkle flour on counter and then lay bread down. Sepearate bread in half. Roll out each portion of dough into a section roughly 10 inches by 12 inches.  (this helps it fit in the pan)

**here's another idea- I would definately focus on the length of the pan to make sure you don't have bread roll too long to fit and ignore the other demention.  I for one am going to roll it thinner on my next run so that I have more cinnamon & sugar mixture throughout the whole loaf. 

Using a pastry brush paint 1/2 the beaten egg onto the stretched dough. Leave a little pit unpainted to help seal the dough roll.  Sprinkle one bowl of the cinnamon & sugar mixture & then pour 1/2 the melted butter on the mixture.  Smear it all together.
Roll up the dough. Place roll into bread pan.
Repeat with second loaf. Cover both pans with towel & let rest for 60-90 minutes.

Preheat the oven to 425

Topping ingredients
1 egg white
4tsp sugar

Once the bread is ready to bake brush with the beaten egg white & sprinkle with 2tsp sugar. The instructions call for a aluminum foil tent on the bread to keep from burning the sugar on top.  They say to add it later. I say add it now for 2 reasons.  Mine was already way crunchier than I like by the time the 10-15 minutes came around like in original instruction. Second reason is to prevent you from burning the snot out of your hand like I did. :)

Bake bread for 15 minutes at 425.
Reduce heat to 400 and cook for 25 more minutes
Bread should be an internal temp of 190

Let cool in pan for 5 mins & then on cooling rack for 90 minutes.

This bread is awesome! Goes great with milk. Its my breakfast as I'm running out the door for work since I've overslept yet again. :)

Enjoy!

 
Picture
This morning I was in a mood where I couldn't take yet another bowl of cold cereal. But finding all the ingredients needed in my house is something of a difficulty pretty often.  When I saw these pancake muffins I knew they would work, even with a picky 2 year old in the house.

Here's What you'll need
1 cup flour
1 tsp baking powder
1/2 tsp salt
2Tbs sugar
 2/3 cup buttermilk (we used condensed milk, regular milk will work too)
1 egg
2Tbs maple syrup
1/2 cup milk chocolate chips

Preheat oven to 350
Combine all dry ingredients in one bowl & the wet ingredients in another.
Combine both bowls together until well mixed.
Stir in chocolate chips
Bake muffins for 8-9 minutes for mini muffins

This recipe makes 24 muffins

You can also serve it with syrup for dipping.

 
Picture
My son loves jello and could probably eat it everyday.  But of course thats no fun, eventually you'll get burnt out on things like that.  That's when my husband pinned this pin for broken glass jello.  But that pin is for later. For the first one we did the other recipe on that website called 7 layer jello.

Here's what you need.
4 pkgs jello any flavor
4pkg unflavored gelatin
1 can sweetened condensed milk

Pick a jello flavor & mix 1/2 a pkg of gelatin into the powder.  Mix in 1 cup boiling water. Stir. Let cool to room temp & then pour into 9x13 pan. 
The directions say make sure your fridge is level. Mine is not & truly theres nothing you can do about it. So I stuck a bag of baby carrots under the pan which wasn't exactly level either.
Mix 1 can sweetened condensed milk with 1 cup boiling water. In a small bowl sprinkle 2 pkg unflavored gelatin over 1/2 cup cold water.  Let this sit for a few minutes & then add 1/2 c boiling water to dissolve gelatin; add to milk mixture & stir to combine. Cool to room tempand pour 1 cup of milk mixture over first layer of jello. Refrigerate for 15 minutes.
Repeat for next 3 flavors Alternating between jello & milk mixture. Let it set & enjoy!

***Tip I recommend cutting the milk recipe into 2 halves. 
For example mix 1/2 can sweetened condensed milk with 1/2 cup boiling water. Sprinkle 1 pkg gelatin over 1/4 cup cold water & then add 1/4 cup boiling water & then cobine together. 
I say this because by the time I was ready for the last layer of milk it had been sitting so long it had started to gel up making my last layer lumpy and thin.

 
Picture
I have a fairly large family and while my husband does not have a particularly large family we do have 4 neices or nephews on his side. I also have 4 on my side and our 2 children.  This means tons of  birthdays & parties & school events & baseball games & cheerleading games & ballet &, well you see my point.
How is one person supposed to keep up with all those dates and my husbands ever changing work schedule and events at my job & doctor's appointments.
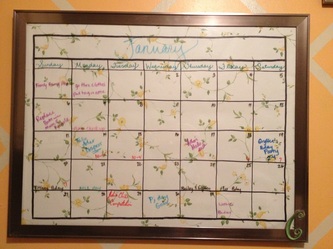
All of that was solved when I found this pin about a calendar.
I made a calendar that is a dry erase board as well. So theres nothing to rebuy next year. Awesome!

Here's What You'll Need:
Large picture frame
scrapbook paper/ wallpaper/ wrapping paper/ fabric
ruler
Permanant marker

Here's what you do:
Cover the back piece of the frame in the paper of your choosing I simply taped mine down
Draw a Calendar frame work onto that paper
Put the frame back together & hang on the wall

Use your dry erase markers to write important dates down.

I use different colored markers so that the birthdays don't get mixed up with the doctor's appointments and things like that.

 
Picture
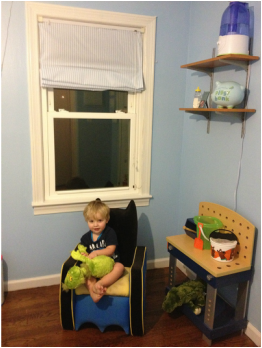
In my son's room I wanted to make window coverings that matched his airplane themed room but wouldn't need to be remade if we changed the theme when he got a few years older.  Because as much as it pains me I know my baby won't be little forever. :(
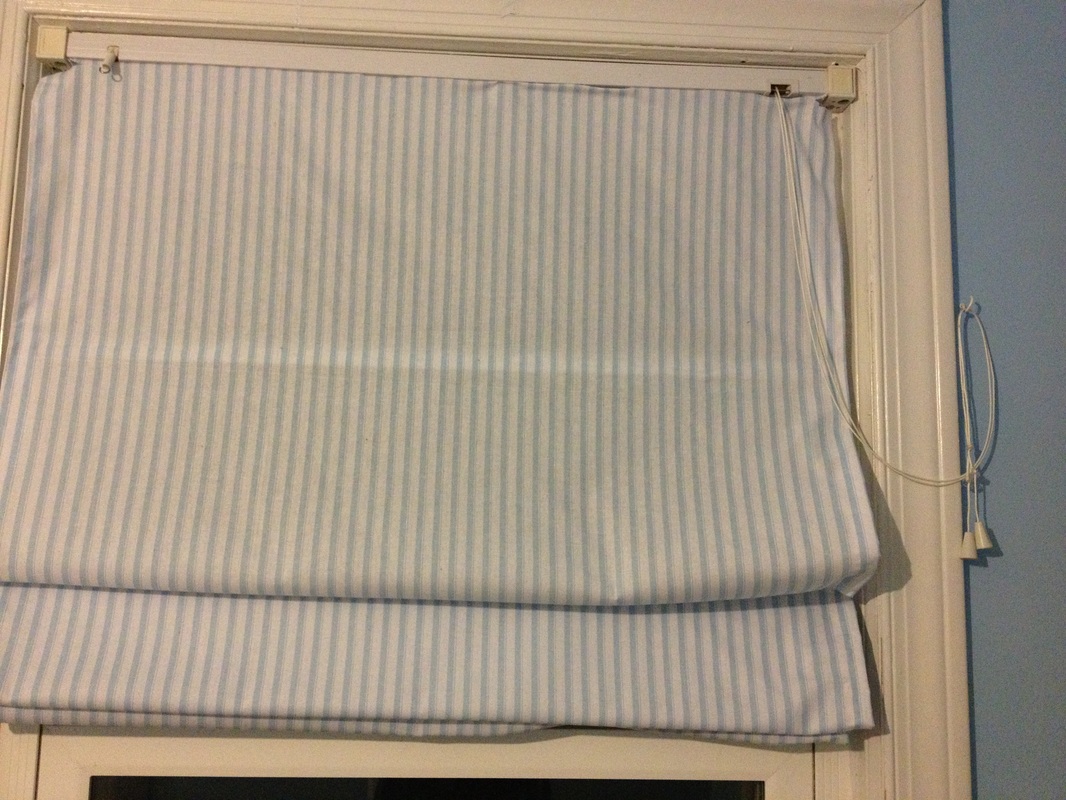
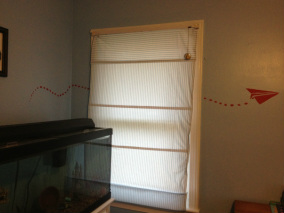
I found these no sew roman shades and knew it would look great.  We had two rooms in the house that had one window with traditional blinds in them and no window coverings at all so I had to do something that would work with the stuff I had in the house as much as possible.  So I took the set of blinds out of the bathroom & installed them in the other window in Gabes room without blinds. 
Here's What You'll Need:
Cheap horizontal blinds
New pretty fabric
Fabric glue (find this at a craft store)

To begin you'll need to cut out all the ladder looking string on the blinds.  Make sure you don't cut anything else or you'll have ruined the blinds.
Next youll need to take the blinds apart.  Look on the bottom slat of the blinds and remove the two little pegs and untie the string on the outsides of the blinds. 
Next pull off the extra slats I chose to keep 4 slats to make even portions when the shades are up.
I laid it out on the floor for all of this to keep it even and just sorta eyeballed where each slat needs to be placed. 
Reattach the bottom of the blinds.
Next take your fabric and lay it over the slats and glue it to the underside of the top of the blinds, the slats in the middle and the bottom of the blinds as well.
Let it dry & your all done. You simply slide the blinds back into their place.

Side Note:
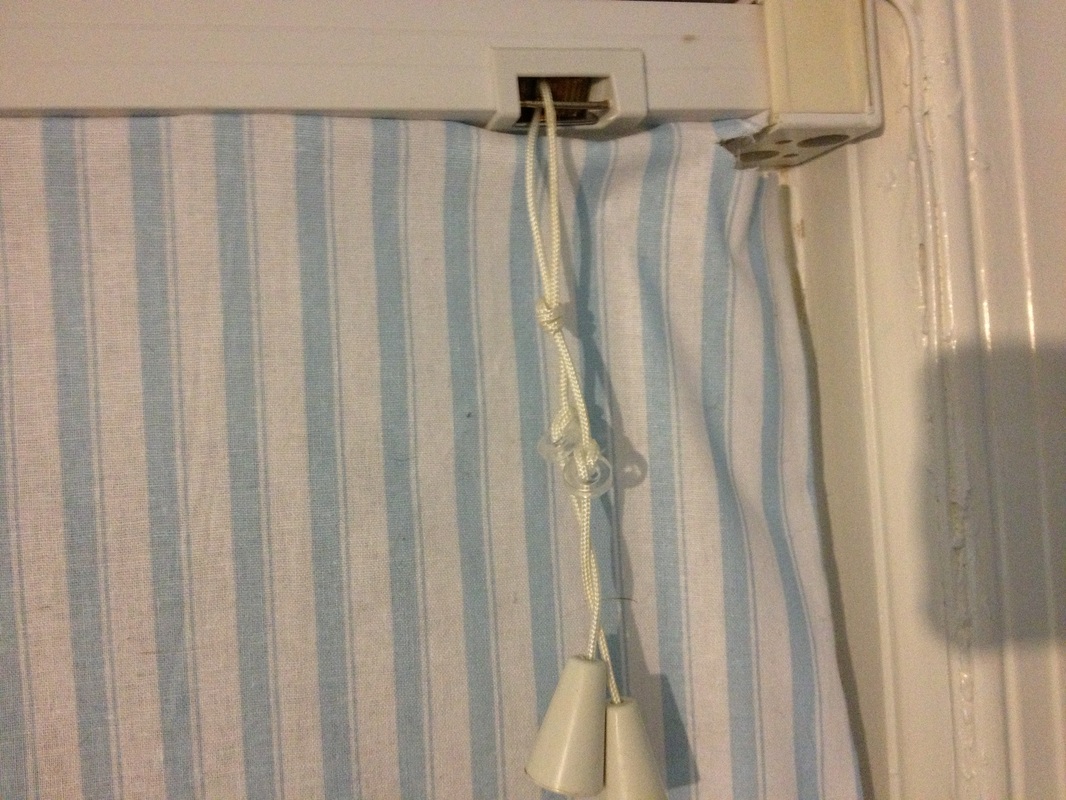
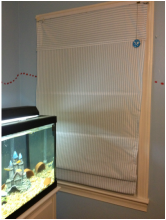
Make sure you glue the material to the BOTTOM of the top of the blinds.  You need to be able to see the string that hangs down to adjust the blinds.  See the first picture bellow.
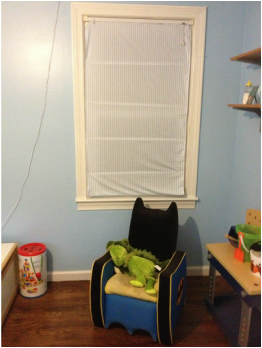
Also if you look in the picture in the middel I added one of those little hooks that screw into the wall to hand the string on once the blind goes up. Since they are in my toddlers room I wanted to protect him.
 
Picture
I saw this super creative way to hide the security system from view. When we moved into our new house I thought I would just deal with the security system and the slightly dented wall next to it.  But when I saw the pin it was a perfect solution.  We love canvas photos and my husband had one created for my birthday a few years ago that I love.  Its oddly shaped and fits PERFECTLY into the small narrow spot between the front door & window.

It does leave the canvas sticking out a smidgen so we added some velcro strips to the corners of the opposite side to secure it to the wall.

And while it does cover up the security panel at night you can see the light shinning through. So that's something to consider.

Here's what you need:
Canvas
2 hinges & screws
Velcro strip

To begin with you attach the hinges to the canvas & then attach it to the wall. 
Place the velcro strips on the canvas & wall and Viola!
All Done :)

This was an easy one of course, no need for me be wordy but I really wanna be :)

 
Picture
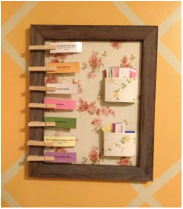
My family and I are like most Americans these days, low on money high on needs.  Since I've joined Pinterest I've seen several posts on how women have kept their grocery budget very low $150 to $200 for a family of four.  Well if they can do it so can I, or I can try to.  One thing I noticed was similar with these women is that they planned out their menu and stocked up on other items.  So when I found this menu board I knew how I was going to keep up with the menu.

Here's What You'll Need:
Picture frame - no glass required
scrapbook paper or wallpaper or wrapping paper or fabric
crayon box or similar sized box
Mod Podge (you can make your own its one part water to one part white glue)
7 clothes pins

Here's what you do
Take the back portion of the frame & cover it in the paper of your choosing and put the frame back together. Spread mod podge on the frame & lay down the paper.  Spread a thin layer of mod podge over the top to seal it in.
Take the crayon box and cut it in half and cover it in the same or different paper of your choosing using the same method as the frame. I didn't use a crayon box I used a medicine container that was roughly the same size. Find what you have in the house its cheaper.  You'll need both parts of the box.  In the top box I keep the menu ideas we haven't made yet & in the bottom box are where we put the menu items we've already created, that way we don't eat the same thing over and over again.
Once the box & frame are dry use super glue to secure the box to the frame and the clothes pins to the edge of the frame.  I left my clothes pins plain but you could paint them or cover the front of them in fabric or paper you can customize this any way you can imagine. You'll need to put something on top of the clothes pins to secure them while the glue is drying. I imagine you can hold them down but I don't have the time or patience for that.
Once that's complete you have a menu board ready to use.

Now for the menu portion. 
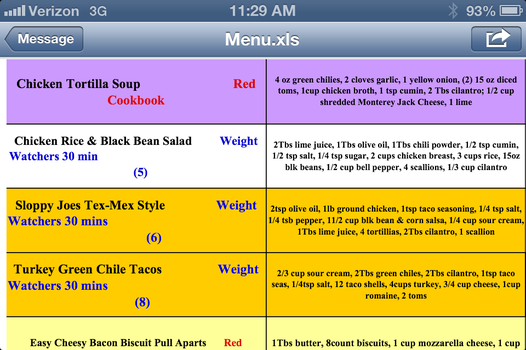
I created my menu pieces on Microsoft Excel using 2 columns. The left column is for the front of the menu piece and the right the back side.  I then print them out & glue them together. The front contains the name of the recipe and the cookbook it comes from with page number.  No sense in know what you want to make and not being able to find the silly recipe to make it. This is where you picture me freaking out in my kitchen because I can't make things up as I go in the kitchen. No ma'am I do not have that ability.  On the back of the piece of paper are the items needed to create the recipe. After I had them all made I had them laminated to protect them a little bit better because, lets face it, I'm accident prone. 
I also color cordinated my pieces because we have designated night of the week to keep the variety alive.
For example one night is Mexican night (my favorite), one night is crockpot night (Monday since I'm still hating the day of work) and another night is Easy food night (ie Grilled Cheese, ect). 


Forgive the phone photo it was the only way I could get a good non-grainy photo of it before it's all cut up. :)
See color coded Purple is crockpot night;  White is easy night; Orange/Yellow is Mexican night, ect.
Enjoy....
 
Picture
I really wanted to make our small bathroom bright and interesting. We already had some VERY interesting speckled tile but I found a teal paint that I thought matched a caribbean theme. I also added tan and cream color bath mats and curtains to make sure not to overwhelm the space.

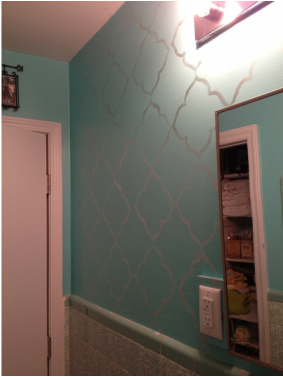
Once the paint was color was decided on I had to decide on what type of specialty paint design I wanted to use to create our space.  I hate wallpaper so that was NEVER an option, especially in a bathroom. Then I found this pin & knew what I wanted to do.  There aren't any instructions on this site but there are several amazing ideas on different painting ideas. You really should check it out. 

Since we didn't have a lot of money with all the moving expenses and 2 small kids I couldn't afford to buy a stencil or any other kind of specialty roller to make the pattern.  So I did what I did for Gabes room. I made a stencil and painted the design on the wall by hand.  Trust me it has taken quite a bit of time and I'm still not done.  It has taken me over 2 weeks to paint the design on one whole wall.  I believe that I'm going to finish the entire bathroom but I haven't made a decision on that yet.


Heres what you'll need for the original design:
Gallon of flat paint of your choosing
quart of high gloss paint in the same color
blank stencil
exacto knife
Paint brush
Here's what you'll need for my fix the mistakes I made in the original design:
Gallon of semigloss paint
Mercury glaze from Marth Stewart
blank stencil
exacto knife
Craft Paint Brush
Start by deciding on the style of design. And create the stencil by tracing that design onto the 8x10 blank stencil sheet. Cut it out using your exacto knife. 
Paint the bathroom wall the flat color you've choosen.  Here's where I went wrong. Because I was painting the bathroom I didn't choose a flat color because semigloss is recommended for bathrooms & kitchens because of the high traffic and moisture. And then when you add high gloss ontop of semigloss it doesn't show up well.
Use your stencil to paint on the design onto the wall. I used painters tape to secure it while I painted. Where to start? I just picked a spot that was in the middle of the wall over the toilet.  It was a place I could reach easily and comfortably to begin my project. 
Once you've covered the wall in your design you're all done!

Now to correct my mishap I went to Home Depot to look at all my options. Martha Stewart of course has her own line of specialty painting supplies and let's face it she's got tons of ideas, she is the crafting queen after all.  I found all these small containers of specialty paint finishes in her section including Glazes and crackle finishes. I got lucky picking out the glaze because it still gives the mostly transparent effect I was going for.  It for sure itsn't my exact original plan but I really like it and so far all of my guests have responded positively.
So I say GOOD LUCK! And stay calm it's going to take awhile.  Paint a little bit & then take a break & come back for some more.  That's what I did.
If your looking for the tutorial on the mason jars you can find it here.
 
Picture
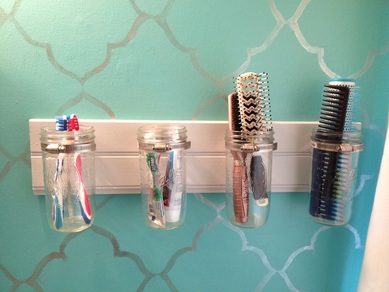
I've mentioned before that we just moved & I went crazy on pinterest to find ways to organize and design our new home.  I found this awesomly different idea for a way to utilize what little space we have in the bathroom.
The bathroom is VERY tiny and only has a closet in the bathroom for towels and I had a towel rack we could have hung over the toilet but if I used it It would have sucked all the room out of the bathroom we did have. 
Have you ever noticed that? Why is it that clean walls will very little stuff on it make a room feel bigger?
Any ways I'm getting off topic. Again.


Here's What You'll Need:
A decorative board
Paint
3 or 4 Mason jars
3 or 4 Hose connectors (the silver ring things)
3 or 4 screws
Screw Driver & Drill

The origianal pin looks like a pallet project or several pieces of wood.  I wanted simple so I opted for a decorative piece of wood.  This can be found in the wood section of Home Depot of course. They have a special aisle for the pretty stuff and The one I used was priced $6 for a single board instead of by the foot ( a detail that can bite you in the but if your not careful.
So I had my husband cut off the size board I wanted & I sanded down the edges a bit to make them smooth & then painted it with leftover paint from the trim work.  Mark the spot on the wall where the board will go.  After you've determined where the rings will be placed you'll need to drill a hole into the boards and then drill a hole in the hose connectors.  Once youve got the holes drilled line up all the holes and place the screw through it and screw it into the wall.  Once it's attatched you simply place the mason jars in the ring & use a screw driver to clamp them down. 

** I recomment anchors to secure it into the wall more tightly
** HOSE connectors can be found in the washer/dryer parts area of home depot. Or you can do what I did and showed them a picture of my