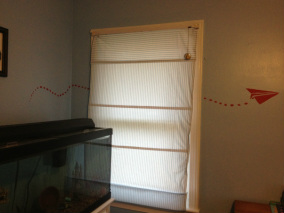
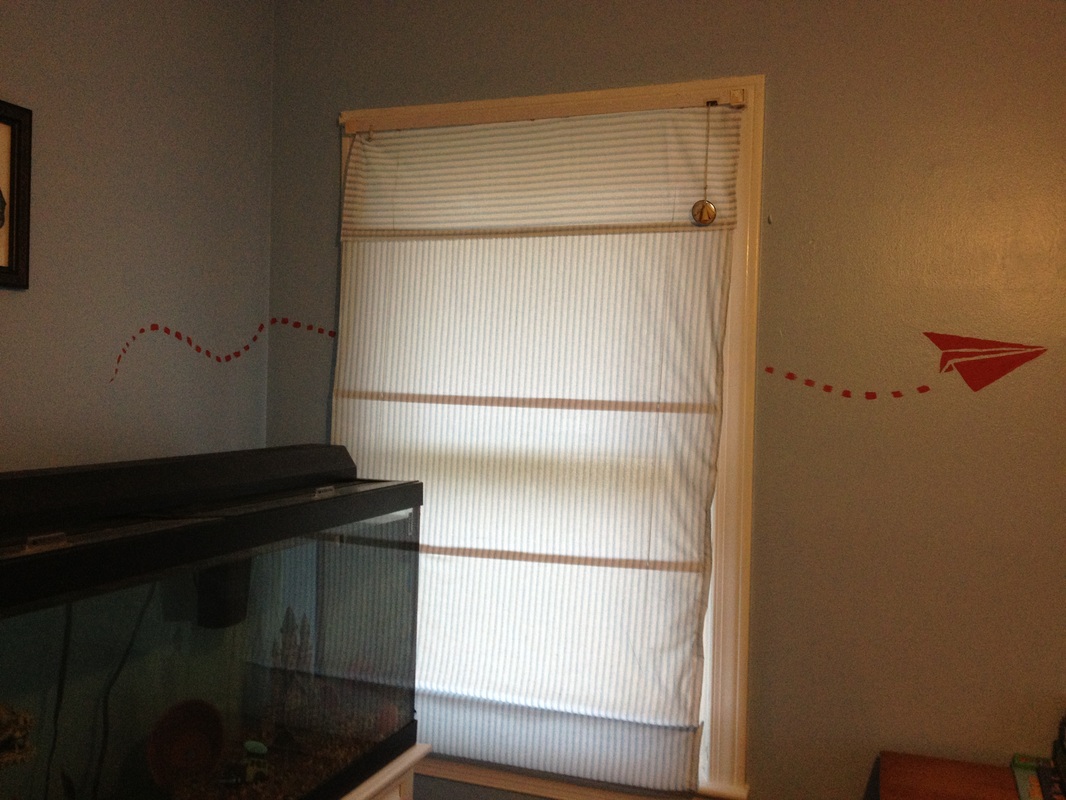
In my son's room I wanted to make window coverings that matched his airplane themed room but wouldn't need to be remade if we changed the theme when he got a few years older. Because as much as it pains me I know my baby won't be little forever. :(
I found
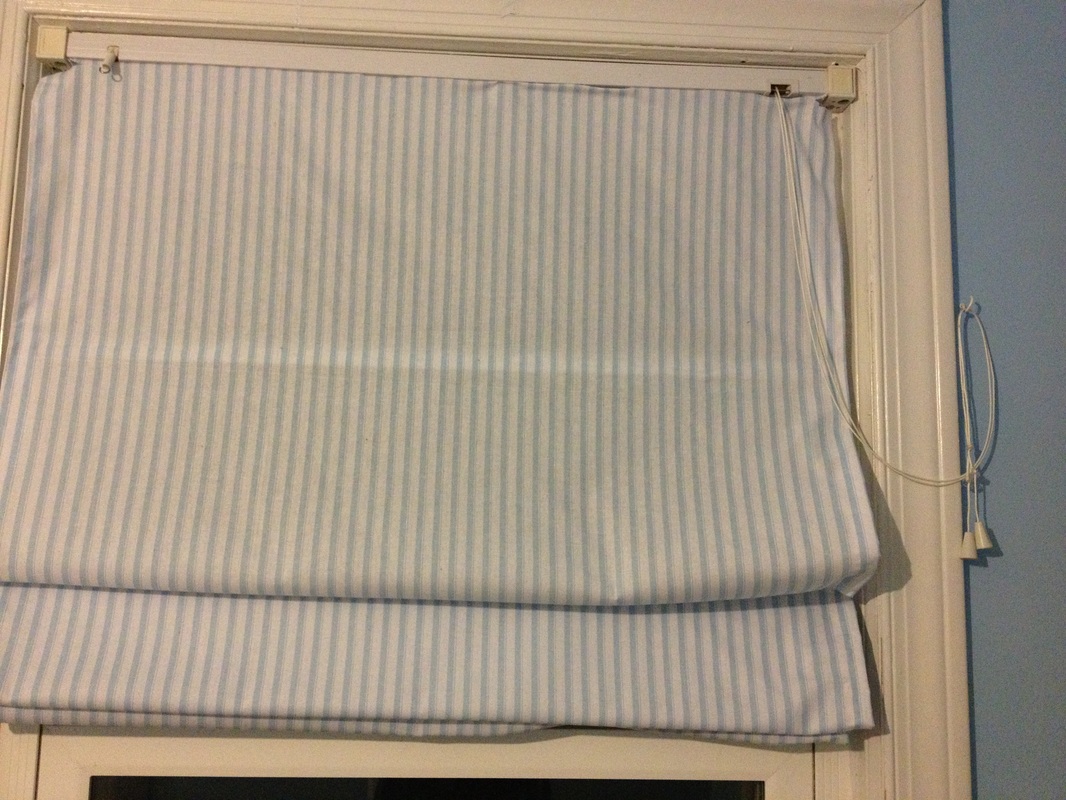
these no sew roman shades and knew it would look great. We had two rooms in the house that had one window with traditional blinds in them and no window coverings at all so I had to do something that would work with the stuff I had in the house as much as possible. So I took the set of blinds out of the bathroom & installed them in the other window in Gabes room without blinds.
Here's What You'll Need:
Cheap horizontal blinds
New pretty fabric
Fabric glue (find this at a craft store)
To begin you'll need to cut out all the ladder looking string on the blinds. Make sure you don't cut anything else or you'll have ruined the blinds.
Next youll need to take the blinds apart. Look on the bottom slat of the blinds and remove the two little pegs and untie the string on the outsides of the blinds.
Next pull off the extra slats I chose to keep 4 slats to make even portions when the shades are up.
I laid it out on the floor for all of this to keep it even and just sorta eyeballed where each slat needs to be placed.
Reattach the bottom of the blinds.
Next take your fabric and lay it over the slats and glue it to the underside of the top of the blinds, the slats in the middle and the bottom of the blinds as well.
Let it dry & your all done. You simply slide the blinds back into their place.
Side Note:
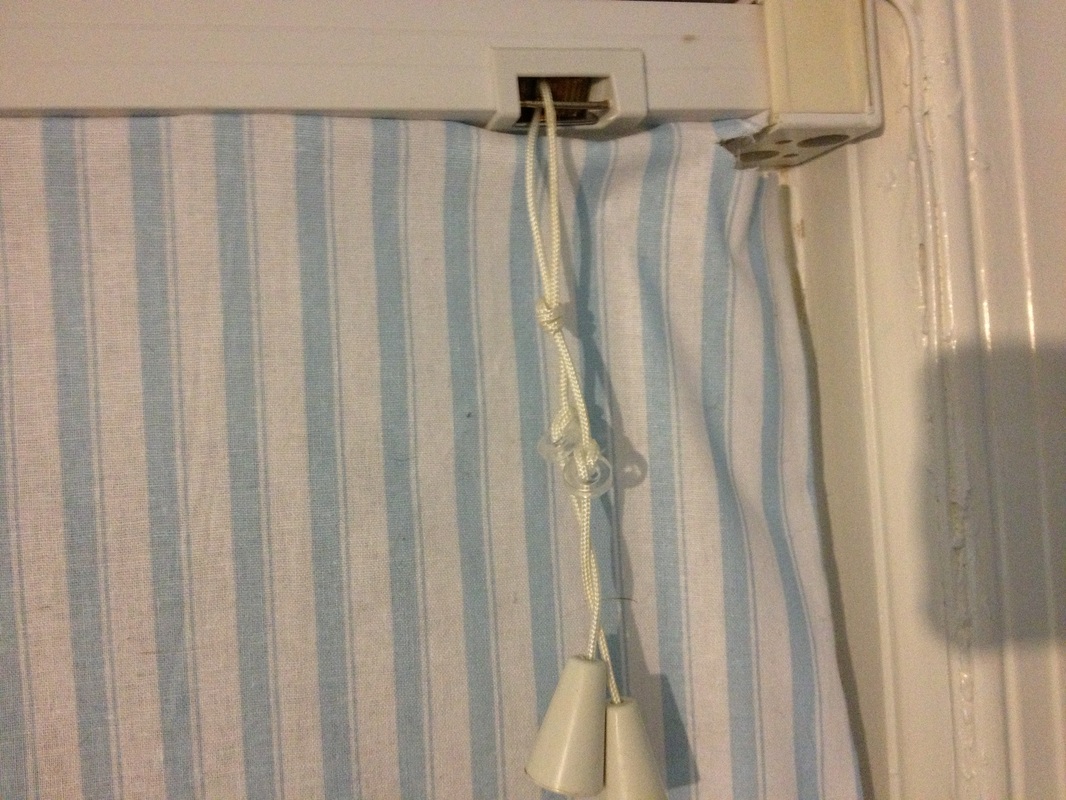
Make sure you glue the material to the BOTTOM of the top of the blinds. You need to be able to see the string that hangs down to adjust the blinds. See the first picture bellow.
Also if you look in the picture in the middel I added one of those little hooks that screw into the wall to hand the string on once the blind goes up. Since they are in my toddlers room I wanted to protect him.
My family and I are like most Americans these days, low on money high on needs. Since I've joined Pinterest I've seen several posts on how women have kept their grocery budget very low $150 to $200 for a family of four. Well if they can do it so can I, or I can try to. One thing I noticed was similar with these women is that they planned out their menu and stocked up on other items. So when I found
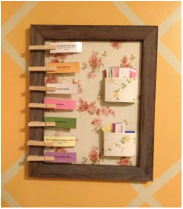
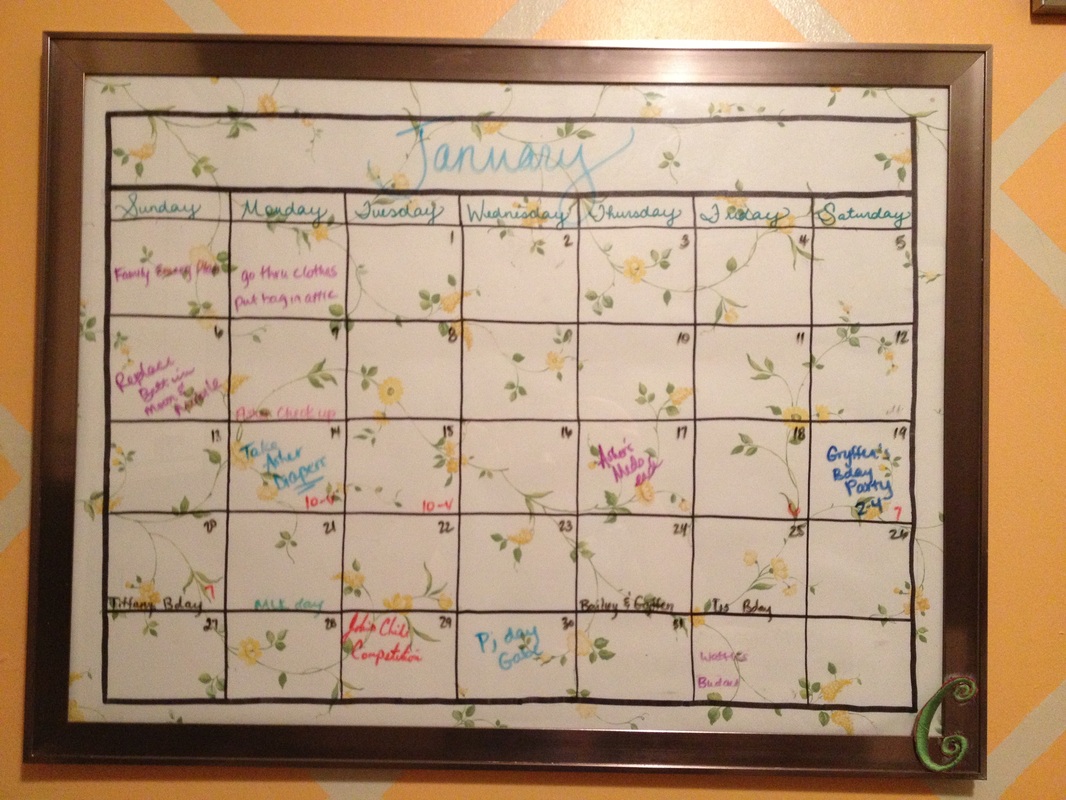
this menu board I knew how I was going to keep up with the menu.
Here's What You'll Need:
Picture frame - no glass required
scrapbook paper or wallpaper or wrapping paper or fabric
crayon box or similar sized box
Mod Podge (you can make your own its one part water to one part white glue)
7 clothes pins
Here's what you do
Take the back portion of the frame & cover it in the paper of your choosing and put the frame back together. Spread mod podge on the frame & lay down the paper. Spread a thin layer of mod podge over the top to seal it in.
Take the crayon box and cut it in half and cover it in the same or different paper of your choosing using the same method as the frame.
I didn't use a crayon box I used a medicine container that was roughly the same size. Find what you have in the house its cheaper. You'll need both parts of the box. In the top box I keep the menu ideas we haven't made yet & in the bottom box are where we put the menu items we've already created, that way we don't eat the same thing over and over again.
Once the box & frame are dry use super glue to secure the box to the frame and the clothes pins to the edge of the frame. I left my clothes pins plain but you could paint them or cover the front of them in fabric or paper you can customize this any way you can imagine. You'll need to put something on top of the clothes pins to secure them while the glue is drying. I imagine you can hold them down but I don't have the time or patience for that.
Once that's complete you have a menu board ready to use.
Now for the menu portion.
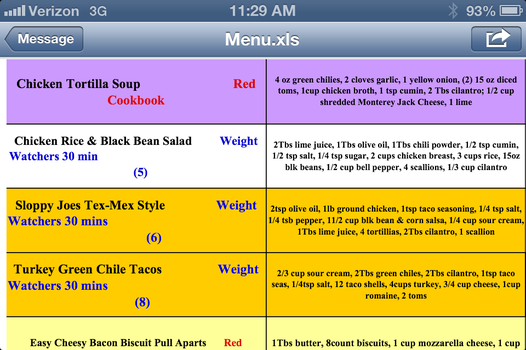
I created my menu pieces on Microsoft Excel using 2 columns. The left column is for the front of the menu piece and the right the back side. I then print them out & glue them together. The front contains the name of the recipe and the cookbook it comes from with page number. No sense in know what you want to make and not being able to find the silly recipe to make it. This is where you picture me freaking out in my kitchen because I can't make things up as I go in the kitchen. No ma'am I do not have that ability. On the back of the piece of paper are the items needed to create the recipe. After I had them all made I had them laminated to protect them a little bit better because, lets face it, I'm accident prone.
I also color cordinated my pieces because we have designated night of the week to keep the variety alive.
For example one night is Mexican night (my favorite), one night is crockpot night (Monday since I'm still hating the day of work) and another night is Easy food night (ie Grilled Cheese, ect).
Forgive the phone photo it was the only way I could get a good non-grainy photo of it before it's all cut up. :)
See color coded Purple is crockpot night; White is easy night; Orange/Yellow is Mexican night, ect.
Enjoy....
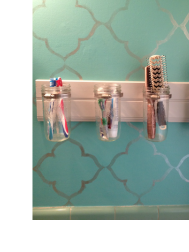
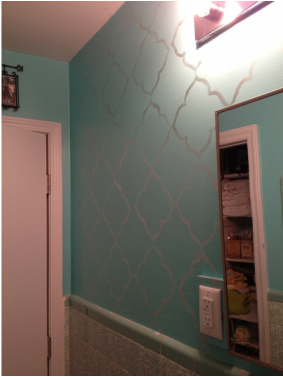
I really wanted to make our small bathroom bright and interesting. We already had some VERY interesting speckled tile but I found a teal paint that I thought matched a caribbean theme. I also added tan and cream color bath mats and curtains to make sure not to overwhelm the space.
Once the paint was color was decided on I had to decide on what type of specialty paint design I wanted to use to create our space. I hate wallpaper so that was NEVER an option, especially in a bathroom. Then I found
this pin & knew what I wanted to do. There aren't any instructions on this site but there are several amazing ideas on different painting ideas. You really should check it out.
Since we didn't have a lot of money with all the moving expenses and 2 small kids I couldn't afford to buy a stencil or any other kind of specialty roller to make the pattern. So I did what I did for Gabes room. I made a stencil and painted the design on the wall by hand. Trust me it has taken quite a bit of time and I'm still not done. It has taken me over 2 weeks to paint the design on one whole wall. I believe that I'm going to finish the entire bathroom but I haven't made a decision on that yet.
| Heres what you'll need for the original design:
Gallon of flat paint of your choosing
quart of high gloss paint in the same color
blank stencil
exacto knife
Paint brush | Here's what you'll need for my fix the mistakes I made in the original design:
Gallon of semigloss paint
Mercury glaze from Marth Stewart
blank stencil
exacto knife
Craft Paint Brush
|
Start by deciding on the style of design. And create the stencil by tracing that design onto the 8x10 blank stencil sheet. Cut it out using your exacto knife.
Paint the bathroom wall the flat color you've choosen. Here's where I went wrong. Because I was painting the bathroom I didn't choose a flat color because semigloss is recommended for bathrooms & kitchens because of the high traffic and moisture. And then when you add high gloss ontop of semigloss it doesn't show up well.
Use your stencil to paint on the design onto the wall. I used painters tape to secure it while I painted. Where to start? I just picked a spot that was in the middle of the wall over the toilet. It was a place I could reach easily and comfortably to begin my project.
Once you've covered the wall in your design you're all done!
Now to correct my mishap I went to Home Depot to look at all my options. Martha Stewart of course has her own line of specialty painting supplies and let's face it she's got tons of ideas, she is the crafting queen after all. I found all these small containers of specialty paint finishes in her section including Glazes and crackle finishes. I got lucky picking out the glaze because it still gives the mostly transparent effect I was going for. It for sure itsn't my exact original plan but I really like it and so far all of my guests have responded positively.
So I say GOOD LUCK! And stay calm it's going to take awhile. Paint a little bit & then take a break & come back for some more. That's what I did.
Yes I'm aware I have yet to do any cooking pins since my fruit snack fiasco until this moment. What can I say I'm scared. :)
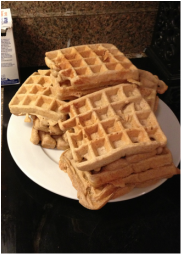
When I was pregnant with my first son I fell in love with waffles. So much so that two people got us waffle irons for Christmas likely because they were tired of listening to me. But I'm an forever greatful to them because I LOVE it especially now that I have
this recipe. I like this recipe because, I found it on Pinterest here, it was created by a woman who is trying to have healthy recipes for her kids. I really want my kids to have the best food possible. I never want my inability to cook to effect their health so I try to make wise decisions and it is a main reason I set myself up for this challenge of pinning for a year. I WANT to learn to cook. I like helping my husband in the kitchen and my son and I have a good time when we are making the few things that I can already make (hot dogs, nachos, cereal). LOL when It's written like that I seem unfortunate. Ok enough about me lets get on with the waffles of diversity!
Side Notes:
** for the milk you can use any milk product as the recipe states & they all taste good. So far I've made this recipe 5 ot 6 times & used 1percent, 2 percent, skim & evaporated milk. It all works & doesn't effect the taste only the fat content.
**I used coconut oil like the original post I like it. It keeps the fat down some too. My only caution is that if that oil gets cold then its going to harden up & leave little balls in your batter. You'll have to strain your batter before you can use it
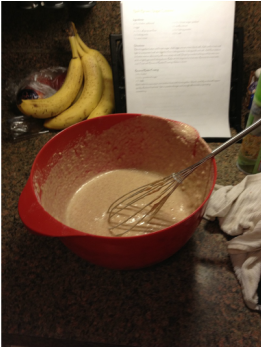
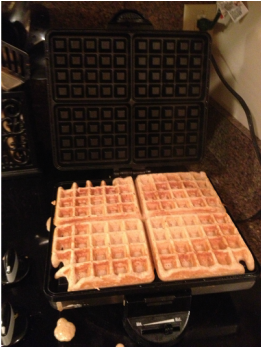
**This recipe also dosn't make a lot of waffles. In the above picture I had tripled the recipe because I knew that I like them. A trippled recipe made about 22 or so. I mention this because they FREEZE great! This is important for me because now I can make them ahead of time & bring them out of the freezer when I'm ready.
**Uses: I make breakfast & lunch sandwiches out of them for me and my son. I have a few mixtures I've used so far. I mix cream cheese & a little bit of sugar & chocolate chips for a breakfast sandwich. For my son's lunches I sometimes send yogurt because he LOVES it regardless of the flavor or the time of day. So now I put yogurt in the waffles and put the fruit in the waffles like I were making a deli sandwich. He tells me it's Nummy Mommy so I'm taking his word for it. I haven't tired it yet. I do use frozen fruit so that by the time his class goes to lunch the fruit is defrosted but still cold and some of the juices have leaked out into the yogurt.
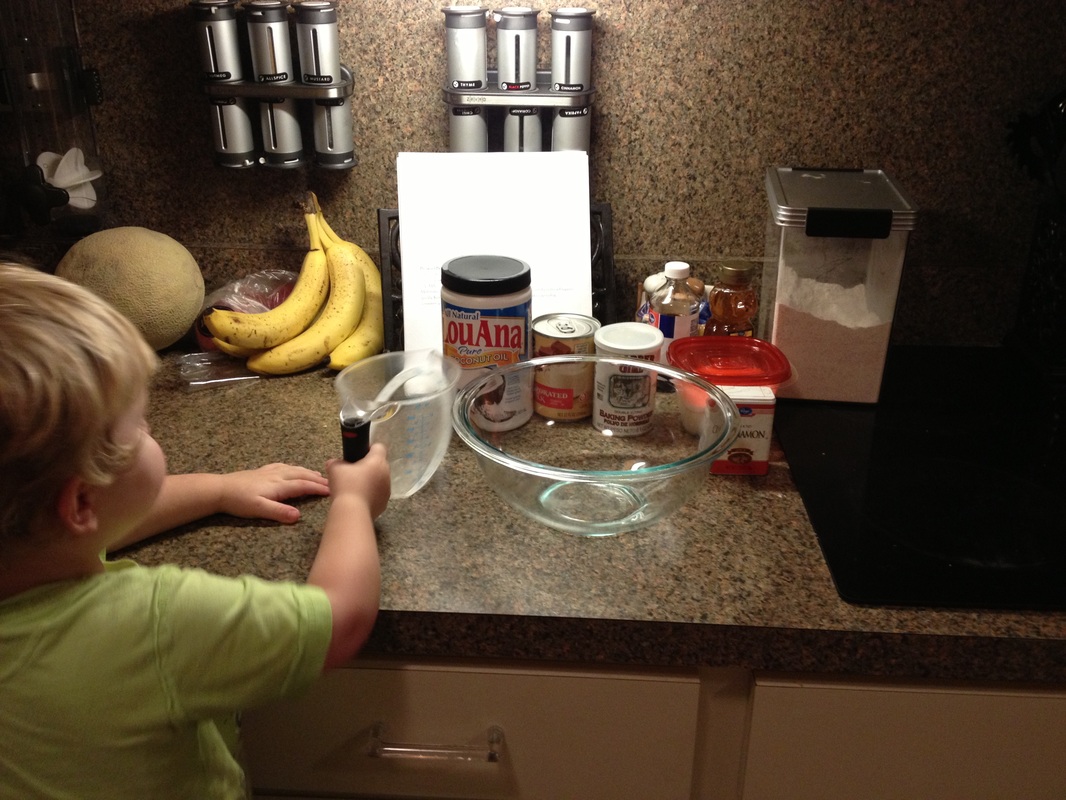
| Begin by turning on the waffle maker. While it heats mix all the wet ingredients together as well as the baking SODA. (i wrote it big because it turns out there is a difference between soda & powder & my first set of waffles failed misserably). Once this is well combined add in the flour, baking POWDER, and salt & wisk it all together.
Since i had a helper I set up all my items premeasured and told him when to pour them in while I mixed.
The original recipe states to put a little dab of butter on the waffle maker on the maker but I used a little spray of canola oil to save on the calories and fat. Then spread out a little of the batter in the center of each waffle pattern. Make sure you don't put too much they expand when heated & it makes an amazing mess to clean up. You need not ask how I know this because it's obvious.
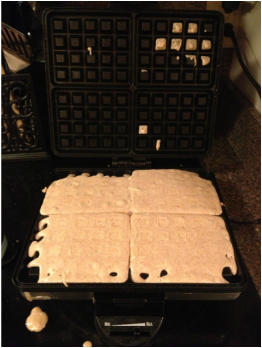 Please note the mess below the waffle maker. Yep this is how I am able to tell you what NOT to do. Because I did it. :) | Heres what you need:
2 large eggs
1 3/4 cups milk**
4 cup oil**
Tbs honey
1/2 tsp ground cinnamon
1/4 tsp baking soda
1 1/2 cup whole-wheat flour
2tsp baking powder
1/8 tsp salt
syrup & any other topping you'd like Tada! Waffles
Or in Gabe's words Tadammmm! |
When we knew the boys were getting their own rooms I knew I wanted to make it something to suit each personality. I also knew the move was going to be a difficult adjustment for my two year old who already had to adjust to having a baby brother enter the world and the loss of one of our dogs who had been there since his birth. So I knew it had to be something he could get excited about and I tried to let him help. So of course Pinterest is an amazing venue for searching for ideas, which I searched tirelessly until I found something that I felt suited him and was easy enough to be completed by my limited artistic ability.
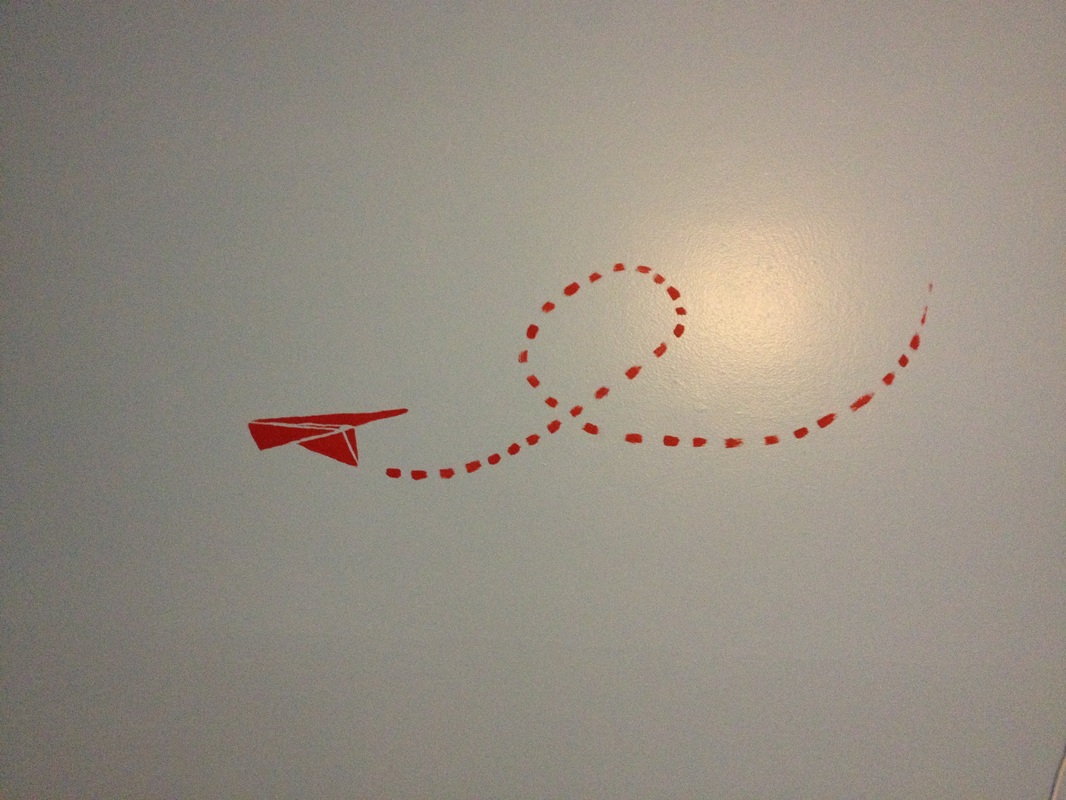
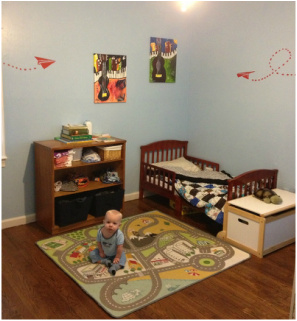
My 2 year old LOVES airplanes so his room was so much fun to design. I painted his room blue so that his walls could represent the sky. I set out several different blue colors and let him choose. I was once told that children need to be allowed to make choices but that as the parent you need to be happy with the choices we give them. So I made sure that I loved every color I sat in front of him because I didn't want to send a message that his choices aren't good enough. Too complex for a 2 year old? Probably but I wasn't taking the chance of hurting his feelings because it would be my luck he would remember the exact shade of blue he wanted. But I'm off topic. (of course) Once I knew the walls would be air I knew I had to incorporate airplanes on the wall some way. I saw several pins where people had painted airplanes on the walls. But guess who's not a professional painter/artist? This girl. :) BUT this pin was the answer to my prayers. Here's how I did it. You'll need a blank stencil (you can find this at Hobby Lobby or many other craft stores) An exacto knife (craft store) Paint--Since I'm painting it on the walls I wanted to use wall paint becuase I've watched acryllic paints crack with age and run when wet. I bought the new sample containers they have at home depot & lowes for about $2. This project cost me about $25 or so. That include the wall paint, the sample paint and the stencil sheets.
My son loves all transportation so I found this awsome rug at Ikea and the road leads to all kinds of cute pictures including volcanoes & icebergs. He loves it & it help him actually learn :)
And of course we have his fish tank. We let him participate if feeding & taking care of them so I'm hoping we are starting an early lesson on responsibility. :)
| |
I traced out a paper airplane template I found online from a google search onto the blank 8x10 stencil page. I created 2 different stencils for this room so that the airplanes would look like they were flying if differnt directions instead of repeating the same one over and over. (I have issues with repetition)
Using your exacto knife cut out the pattern of the plane.
Once I was ready to paint the planes I secured the stencils on the wall with painters tape. I used one of those sponge paint brushes which was kind of messy I had to go back and touch up some of the lines. So I would recommend using a small crafting paint brush. I will take you longer to paint it likely requiring a few coats but it will save you time because you won't have to touch up anything. After the airplanes themselves were complete I hand drew on the smoke marks onto the wall to show the airplane's path. I tried to make the airplanes placement and smoke lines sugges that they came in his room through his windows. I also put one on the inside of his closet door. An idea I got from my neice Hannah. :)
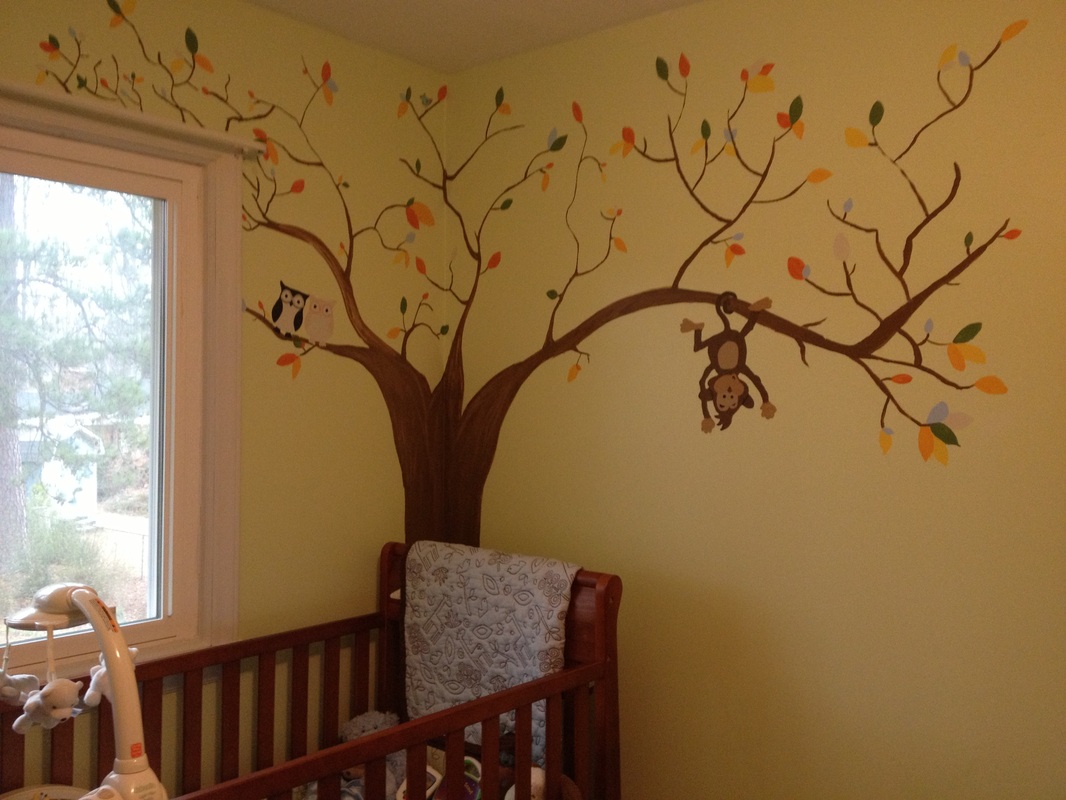
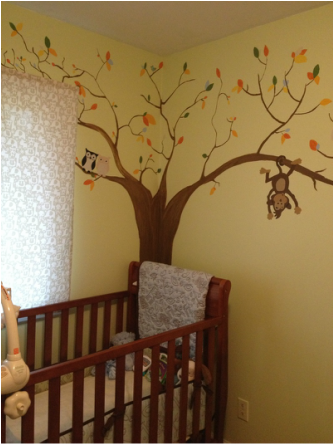
| | My infant's room was easy to design because I already had his bedding and it was a jungle theme set that I found from the Gap. I really wanted to make sure I didn't have 2 blue rooms, just because they are boys doesn't mean that they both have to have blue rooms. So I picked the green from his bedding and make it a jungle themed room to match. Here's the pin I used to inspire me. For his room I had to enlist the help of my mom who is a GREAT artist. We worked together on the tree for his room because there was no way to make a stencil of this magnitude. So we drew the base of the tree with a pencil before we began painting. I had to get a few different color sample paints for this project. Several for the leaves and the monkey. The other colors I created by mixing things together. Once we had the basic design of the tree limbs painted we began placing on the twigs that would connect to the leaves we haven't painted yet. Then we each took a color and began painting leaves randomly. We were very careful to make sure that left places for the animals to be placed. To make the monkey and the owls I printed out a picture of each and cut it out. I traced it into the place it belonged on the tree. Once it was traced on I painted in the details with the proper colors. There is also a blue bird in the very top of the tree but I hand drew that.I also made his curtains from this really cute tan and cream colored patterned fabric I got from Joanns onsale. (They always have coupons and amazing sales.) |
At the end of the year we moved into a new house and our boys no longer had to share a room. I was SO excited to be able to paint the walls any color I wanted and decorate each room with a theme. I love to create things and I found
this pin that showed you how to create your own canvas with any words you wanted. When I made these the link to the page worked but doesn't exhist while I'm writing this. So I'll try to explain how to do it.
The original link said to use a circuit machine, something I don't have so I'll tell you how I made it without one.
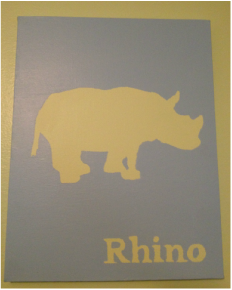
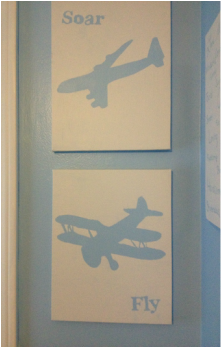
I found my canvases on sale at Michaels Craft store for 50% off in packages of three so I was so excited. I decided on a jungle theme and transportation theme for the boys room. I wanted the canvas to follow the same theme. That's when I saw
this pin and knew what I was going to do.
Here's how you do it.......
Take the canvas and paint it the background color. In my case for the jungle room the background color is blue. While the paint is drying find the silhouette on the internet or draw it out on paper. Once you've gotten the drawing to the scale you like then trace it onto contact paper. I used words on mine as well so here I printed out the words I wanted in a word processing program and then traced that onto the contact paper. Cut the pictures and words out of the contact paper and place them down on the dry canvas. Make sure its nice and stuck on the canvas and then paint over & around the picture and words. BE VERY GENTLE when painting over the words it could move your letters slightly making it impossible to read later and require major touchups or having to redo the project entirely. Trust me I had to redo the completely word canvas a few times. Let that dry and then peel off the contact paper. Viola you have your own designed canvas.
SIDE NOTE:
It doesn't matter what color your contact paper is though if your tracing out a ton of words I suggest clear if you can find it.
If your doing complete words I suggest using a small paint brush to simply paint around the words and save yourself some time in the long run.
Also if your looking for a more colorful design you could swirl colors together for the background. Or you could paint on top of flea market finds like those canvases or pictures your find with hotel quality pictures behind it.
Today Gabe and I made air fresheners. You can find the original pin for it
here.
As I've mentioned before I have 2 small boys who I love with all my heart. Most of my pregnancy symptoms have gone away with the exception of the rediculous amount of pounds of course, and the pregnancy nose. I can smell when people in my office are eating lunch at their desk and I can, for the most part, tell what kind of food they are eating. Why am I telling you this? Because it's why I decided to make these air fresheners. I can't stand the smell of plug-in air fresheners or the spray kinds. They make me sick to my stomach and give me a headache. But I have a large breed dog and two messy kids a messy husband (sorry babe but its true). My house smells odd sometimes :)
I LOVE THESE THINGS! My house doesn't smell and the only time you smell the oils is if you close the room off you smell it for a few minutes then and then the smell dissipaits. I have one on a shelf near a window. This weekend we had amazing weather in the middle of winter, welcome to Georgia, so I smelled the cirtrus when the breeze was blowing in the window.
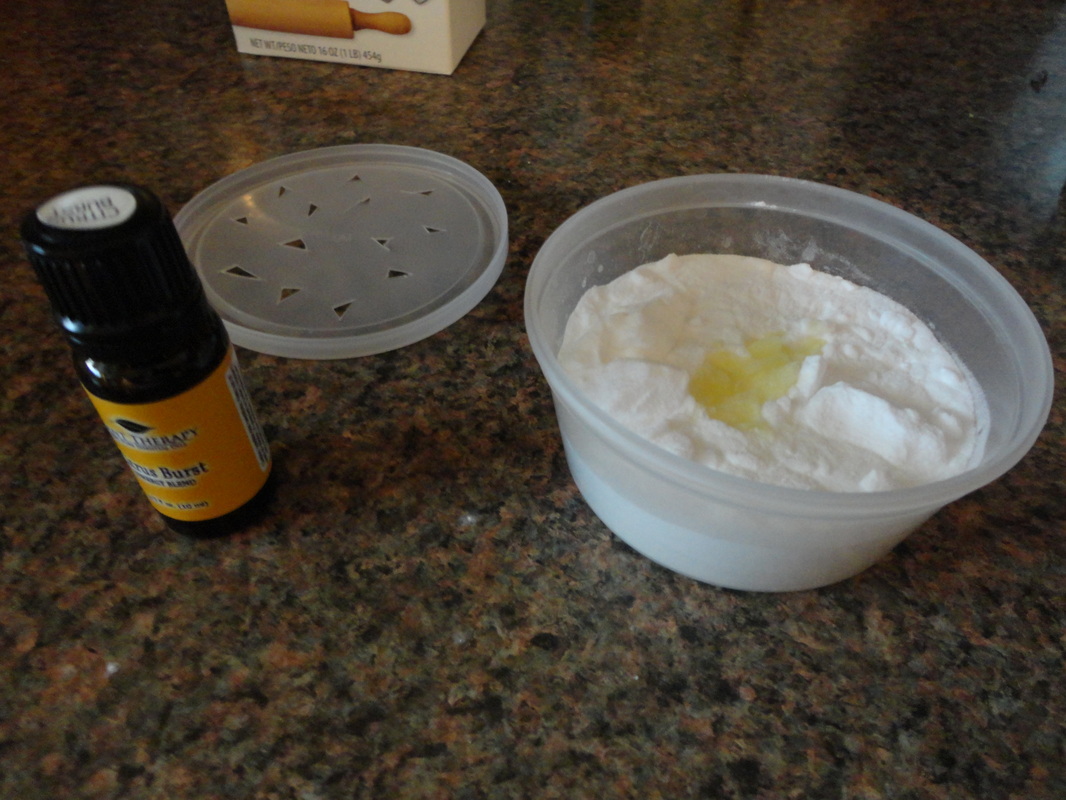
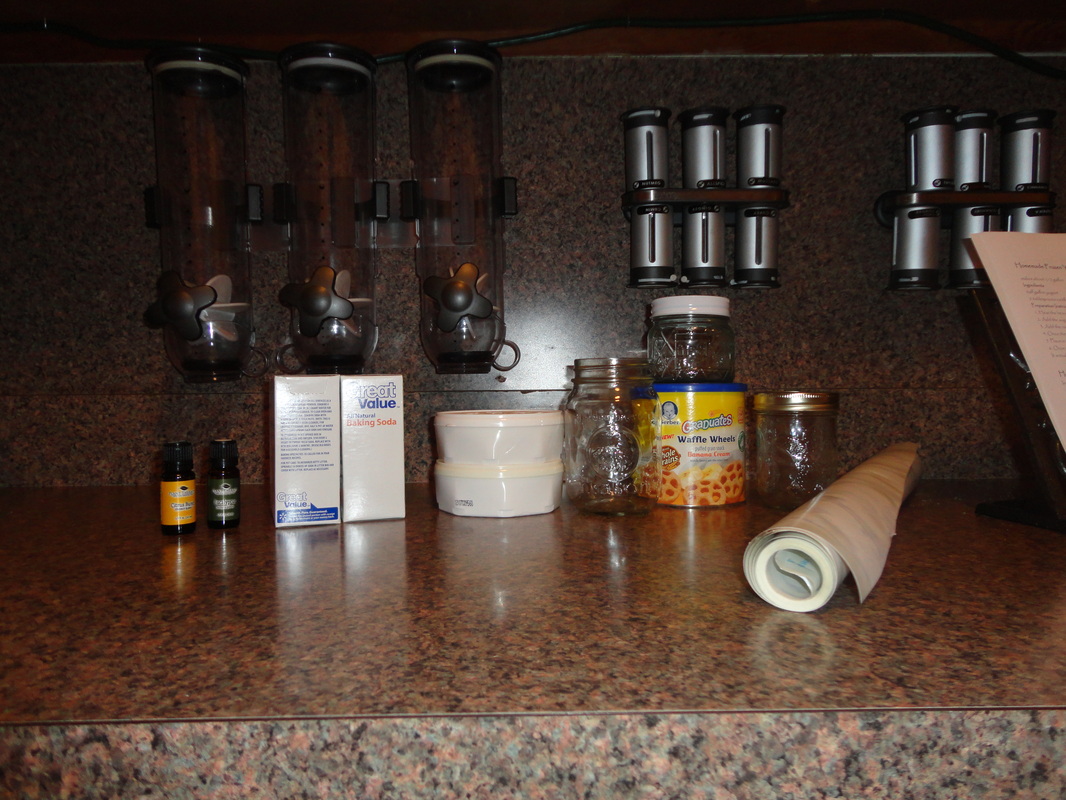
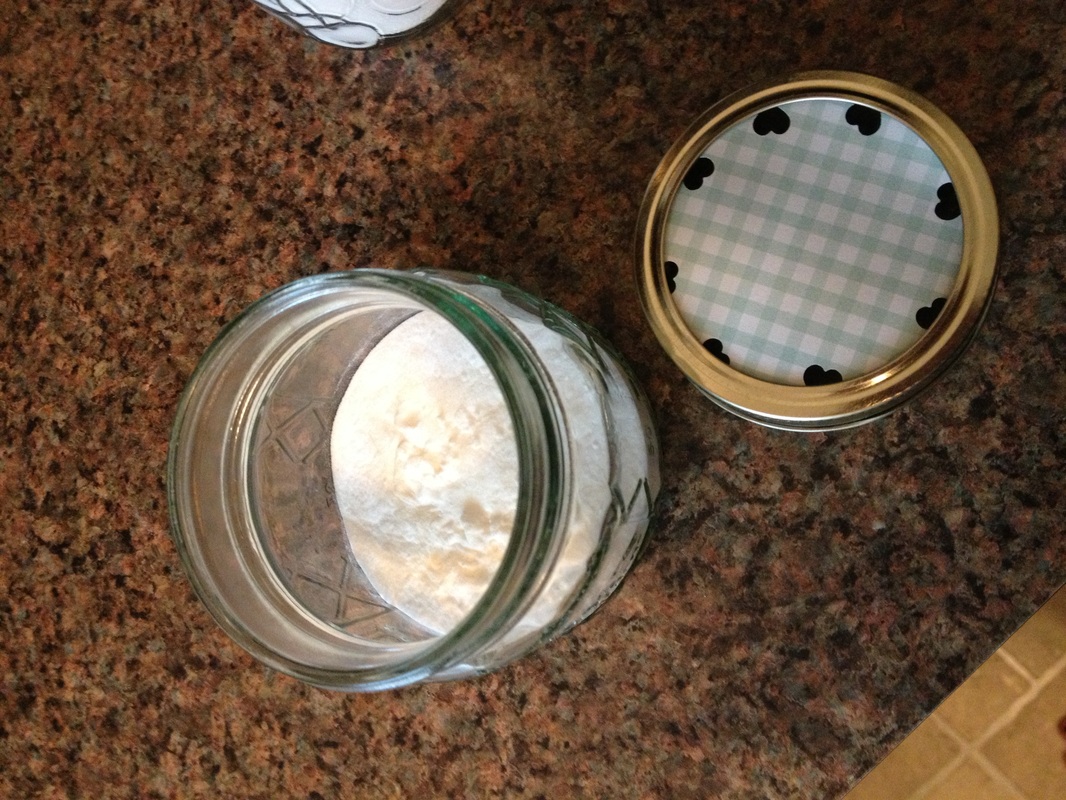
I reused several kinds of containers that were already in my house. The one in the picture above is a butter container form organic butter that I got at the farmers market. I cut holes in the lid and used it in the trashcan. The whole point of the baking soda is to absorb smells, its why your supposed to keep a box of it in the fridge to keep the smells contained so they don't affect other foods in there. I love the smell of citrus it make everything smell fresh and clean so the essential oil I chose was a citris blend. You place the baking soda in the container & then put several drops into the container. Replace lid & you have a homemade baking soda air freshener
I have some pictures below to help out if you need it. :)
Here's what you need:
Containers of your choosing
Essential oils of your choosing
Baking Soda
Place about a 1/2 cup of baking soda in the container.
Then use about 8 drops or so of the essential oils of your choosing. I'd honestly say start small and go big if you need to because you don't want to have to start over.
Viola your done
Side note
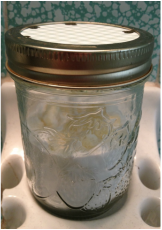
I found several kinds of bottles in my house that worked. Anthing from mason jars to Gerber graduate food containters. I even used a honey container for one of my boys rooms. I used citrus in the trashcan, bathroom and living room. But all of my men have breathing/sinus problems so I used Eualyptus for the ones for the bedrooms. Because I read here that it was good for sinus problems.
In the fridge though you'll need to make sure you don't use any essential oils it's only there to absorb smells. | |
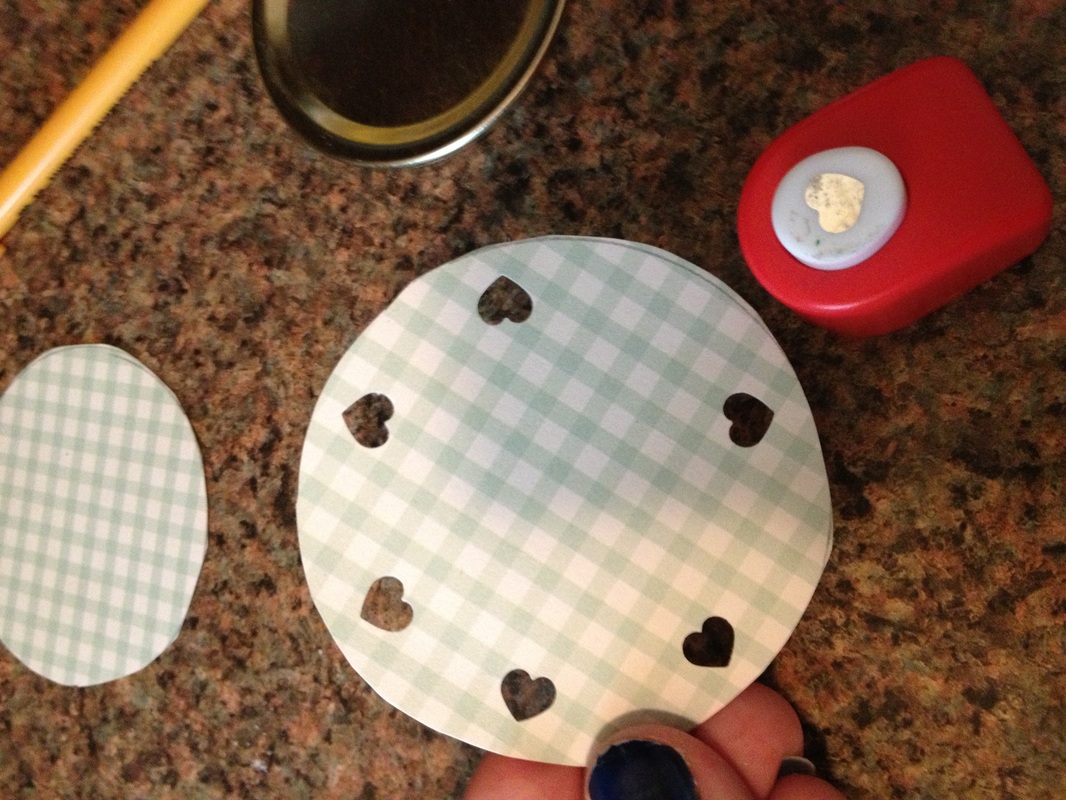
Below are some photos of the ones I created and some of the steps.
 This is the one for the trashcan. Its plastic so it doesn't get broken 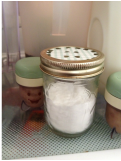 Here's the one in the fridge. I did put more holes in this one to make sure to keep the fridge smelling fresh. | 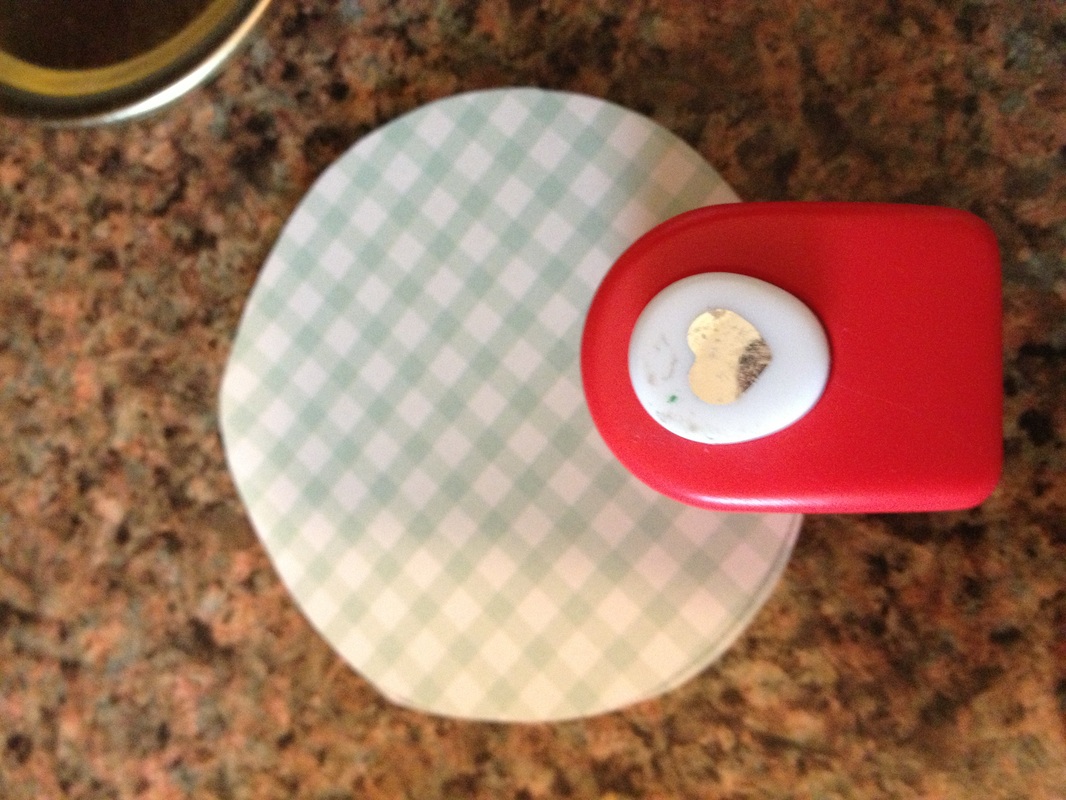 I used left over scrapbook paper and a scrapbook hole punch. 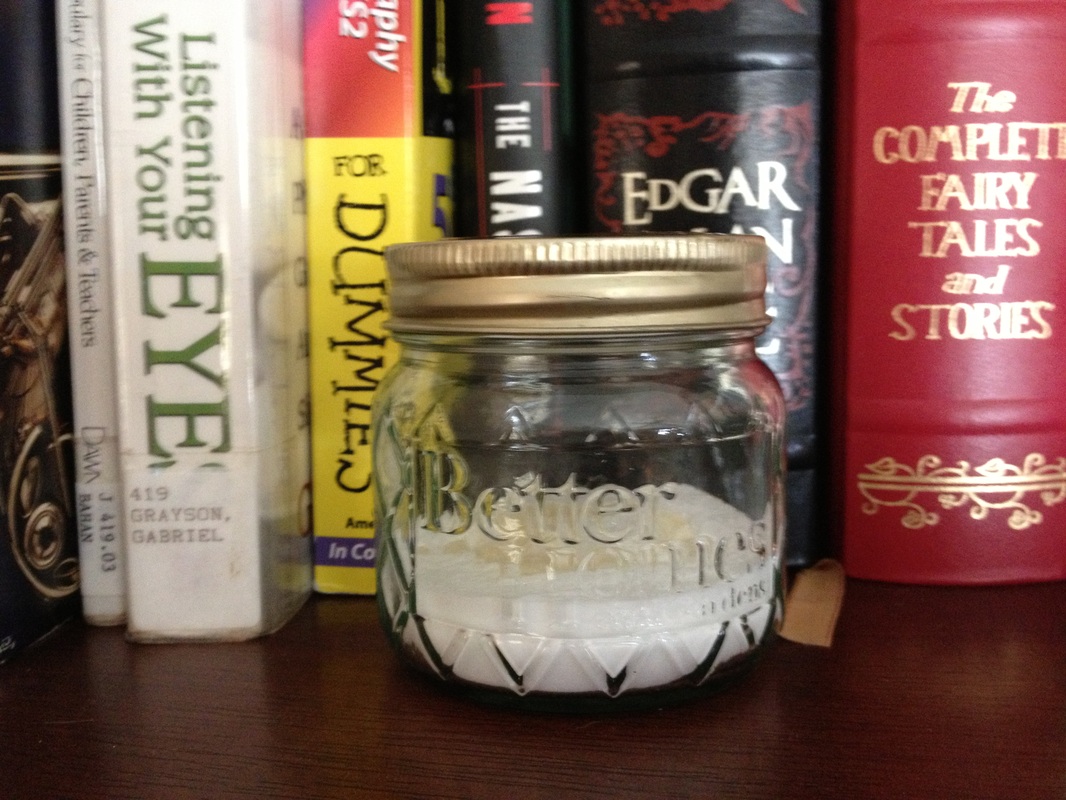 I used the pretty mason jars with the pretty paper to put in ones that are being seen. | | |


 RSS Feed