Let me begin this by saying I used 2 different pins on this one. The first one I was disatisfied with the results and the second one i was too but it appeared better at first.  The second one does seem to work a little bit better once I adjusted some.  Theres a third one I just found that make the powdered not liquid detergent. I may try that next.
Below you will find the directions to the second pin. The one that I used and kept

Update! IT WORKS!!  Simply add a little bit more hot water & mix it up very good.  It will stay liquid to use it.

Alright Here's What You'll Need:
1 bar of soap (I used Fels Naptha)
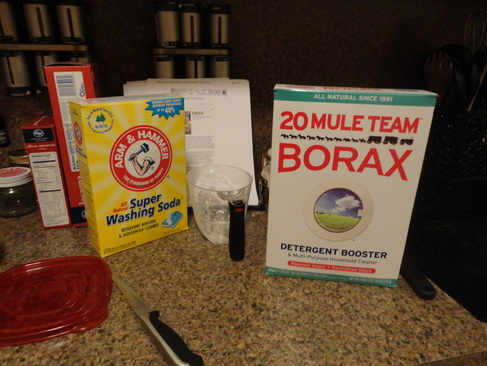
1 cup of Borax
1 cup of washing soda
a large pot to hold 2 gallong
a grater
a funnel
and a container for the finished product


To begin grate the bar of soap and place it in a pot of a gallon water. Cook until it's desolved. Next add the Borax and washing soda & bring to a boil.  It should coagulate ( I didn't see that too much)
Turn off the heat & add one gallon cold water. Stir well. Pour detergent into container & your all done. I would suggest adding a little bit of hot water to this perhaps it will keep yours from going solid at all. Or you can add it later like I did.

The detergent works GREAT for my clothes. I have 2 small boys and I almost never have to use my stain spray these days.
Both recipies are very similar. They require a bar a soap to be melted in
water. Though each pins have different kinds of soap. One says any kind of soap
you want. Another says Fels Naptha bar soap. I couldn't imagine any kind of soap
working so I opted for the Fels Naptha because its designed for laundry.  Its
bright orange, which I wasn't expected but it smells GREAT.


Once you've melted the soap in water you'll mix in the designated amounts of
borax and washing soda. Both recipes then ask for more water.

Pin #1 tells you to let it
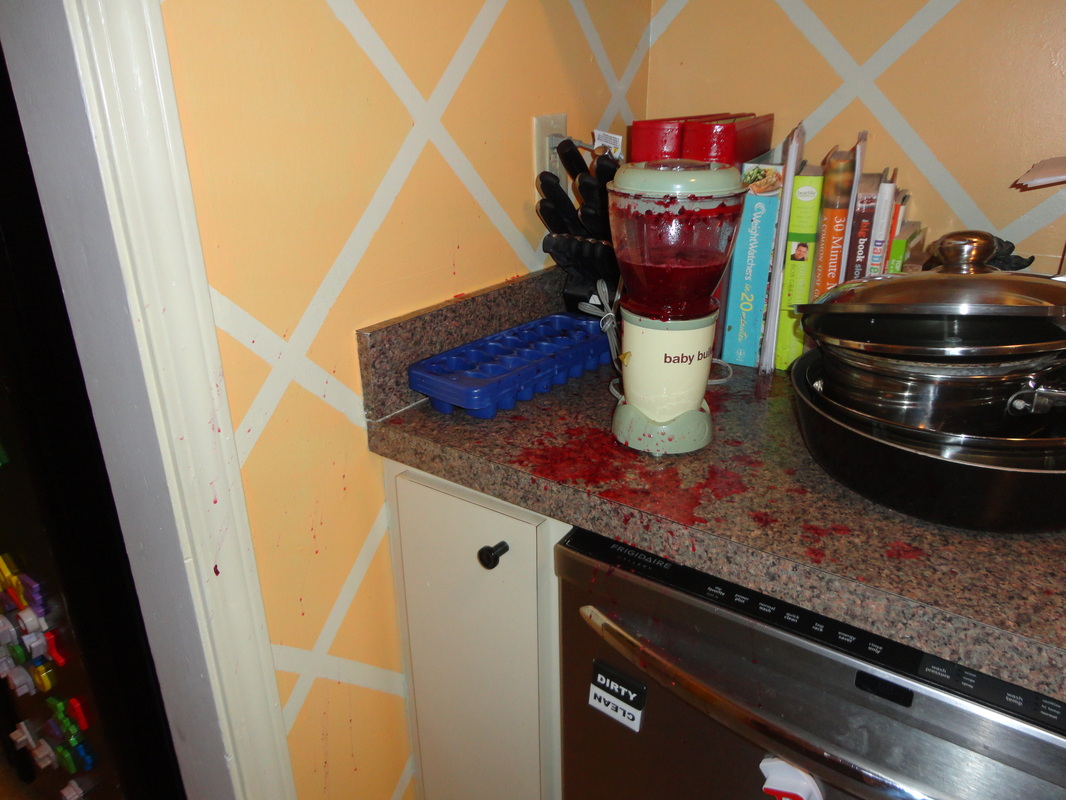
sit out overnight & it'll solidify into a watery gel mixture.  Unfortunately
my became a solid mass on the top & a watery mess on the bottom. I tried
mixing it back togehter with a hand mixer but it became very lumpy and quite
yucky.  So I poured it out & started over.
Pin #2 doesn't require
sitting out but once I put it in my jugs the results were the same a squishy
solid mass.
 
I'm excited to try this because
this would save my family hundreds of dollars a year.  Think about it. Laundry
detergent for a larger jug at BJs Warehouse will cost you upwards of $25 even
with coupons. And I do ATLEAST one load of laundry a day if not more.  Its a lot
of laundry detergent.  I probably paid a total of $20 for the three products
required to make the detergent.  I've made 2 large batches so far and I still
haven't put a dent in the Washing Soda and Borax boxes. 


I will say with the 2nd pin recipe I was able to add
a little bit of hot water to the jug and shake it a little and it mix togther
and was no longer a solid but was a consistency that was useable.  I washed my
first load of laundry with it today. No problems I can see. Now I only have to
figure out how to get water into the other larger jug and shake it up.
:)


  My husband figured out that a little hot water makes it liquid again to use. So if yours turns solid add a bit of hot, I mean SUPER HOT, water and mix it well.


Oh well........ See you guys tomorrow!


My son LOVES fruit snacks.  I mean like LOVES LOVES LOVES them. But they aren't the best snack food, convenient yes, good for you no. So i wanted to find a recipe to make our own in an attempt to save money.
I found 2 different pins. One pin takes boxes of jello to make fruit snacks, I'll likely try that one next.
This recipe uses all natural ingredients. I tried to stick as close the recipe as I could.
In the picture you will find my results :)
Let me begin this post by mentioning the number of times I have set a kitchen on fire & been subsequently banned from the kitchen for any reason.  Since the beginning of my marriage I have set it on fire 3 times.  I know where the fire extinguisher is & I'm not afraid to use it.  We even have a small kitchen specific spray can. And my mistakes are silly ones, which I believe are more scary. I turned the wrong eye on once and set the rag on fire that was sitting on it. I have also set the pot on fire because I forgot about my ramen noodles. :) See? scary. This is why I have spent the majority of my marriage asking my husband "What's for dinner?" or "What are you making tonight?" I mention this because part of this blog process is to grow as a person and with two small children need to eat more than nachos and hot dogs everyday. So I intentionally decided to do this pin instead of the other one to push myself.
Here's what you need:
Gelatin (found on the baking aisle with the sugar and pectin) The recipe calls for 5Tbs I disagree
Candy molds/ Ice tray/ or pan as the instructions suggest
2/3 cup Fresh or Frozen fruit
1 or 2 Tbs Honey
2/3 cup lemon or orange juice
Extra Step: I used blackberries for my fruit & they are FULL of seeds, that I hate. So once it was pureed I had to strain out the seeds.
Let the mixture sit for 5 or so minutes off the heat.
Begin stirring in gelatin 1 Tbs at a time. And then pour the mixture into a glass pan or into molds. I had these cute silicon ice tray molds we bought at Ikea earlier this year, so we use those.
Picture
Here's my lovely assistant showing you the trays :)
To begin combine the juice and the fruit together in a pot & cook on med heat stirring occasionally until fruit is tender. 
Once the fruit is ready incorporate honey
Once your done your ready to put the fruit in the blender. In my case the baby bullet (thanks again Hamma this thing is awesome!)

Attention Cautionary Tale

Picture
PLEASE secure the lid on your blender BEFORE you turn it on. Or you will end up like me covered in steaming hot fruit juice. It was also on 6 of the surrounding 7 walls, ALL the cabinets & cookbooks and a million other things.  So learn from me. Say it with me people.  Pour in liquids, SECURE LID, turn on blender. :)

Picture
Now these are ready for the fridge. Where they will sit for 30 mins to an hour.

The final product was not what I expected. They were so hard and rubbery that they bounced.  This is why I mentioned earlier that there may be too much gelatin in the recipe.  So my husband, the chef (literally), is going to make them with me again another day so that we can figure out what went wrong. Because I assure you I likely did something wrong between the explosion and cleanup and everything else.  I highly doubt the recipe is completely flawed and that isn't the purpose of the blog any ways. 

Sooooo stay tuned for an update.

Do you know what I did wrong? Comment or contact me
 
Picture
Today I decided I needed more storage for all the boys toys and things they got from Christmas.  So I had to find a place that would be out of the way and not clutter up my house.
Normally I'd just buy a rubbermaid tub to go under the couch but our couch only has a small clearing to the floor. I believe 4 inches or something like that.  Which if that size exhists I've never found it in Walmart.
So I found this pin and it inspired a thought of making my own box with leftovers of Christmas.
When I saw the box for the play kitchen my son got from his Hamma (thanks Mom) I decided I could make it happen. So.....

I began with the kitchen box & broke it down to make cutting a little easier. Next i measured out 4 inches from edges.  That way once i taped the "boxes" back together they would be 4" tall boxes ready for use.
My mom is actually the one that suggested fabric, also left over from making
various things through the years. I had to large scraps left over from curtains
I'd had in our old house and had to be shortened when we moved into our new
house. I layed that fabric down & cut it to size for each side of the box. I
used my handy hot glue gun to glue down the fabric.  I also needed a way to get
it out from under the couch so I puched holes with scissors in the front and tied left over ribbon in
it. To secure it I poured hot glue all over it too.
Side note: please put your hot glue gun back in the same place and don't touch the molten hot glue :)
I'd say this note isn't needed but I left out the ample burns and inappropriate words that came out of my mouth during this project. Ouch also happened a few dozen times too. Sooo Good Luck!
The boxes aren't perfect they bend a little when I pull to get stuff out but they organize my home so they  make me happy :)
So that's it! Hope you enjoyed it. Hope to see you tomorrow!
Next I taped the boxes back up. I pondered for awhile on how to make them pretty because while they are underneath my couch the fact that they have to come out from under there to get stuff meant they would be seen on occasion. Besides I can't show off my craftyness with ugly torn up kitchen play boxes. I was thinking I'd use wallpaper or paint both of which i have left over at the house.
Here's the finished box pushed slightly under my couch. I had enough box for 2 complete "couch drawers"
 
Part of my quest include trying to organize my life and our house. I have the physical need for organization I'm sure my husband will never understand. And with two small boys I'm certain they wont get it later.  So in an attempt to stop the arguments and feeling like nothing ever got cleaned or done in a timely manner I created a family planning book. This is based on an idea I got of Pinterest of course. You can find the link to the original pin here.
I took the idea from the pin but I had to change it to suit my family.
Picture
Originaly I had the various printables the I found either through this pin or through verious emails that I've gotten.  But they were all different style and colors and I just couldn't handle that. I've had a love of polka dots for a few years now so I decided to create our family planner with bright primary color dots. Mostly because I thought the bright colors would make it more appealing to the men in my life. :)
Also I have decided to print them & put them in the plastic sleeves so that I can write on the plastic with dry erase markers and save myself some money for the ink and paper for the printing. Plus I love the idea of not wasting trees to print tons of things out.

The planner has 5 basic sections.
Cleaning Lists
Goals
Event
Planning
Calendar
Emergency Plan
The cleaning tab has multiple pages including a weekly, monthly and yearly cleaning list.  I also included in this section a House maintenance list to write down all the things around the house that still need to be fixed or have recently broke. For example since we've moved in we still haven't finished patching a hole in the ceiling in the bathroom. Shame on us I know but it just needs some sanding and painting. (That's me trying to make myself feel better about it ) This is an important list because my husband has his own box on the cleaning list. Since he has alternating days off I couldn't put down things on a specific day and hope he sees them. He gets his own list and that way I'm not bombarding him with multiple ever-changing honey do lists. 
In the Goals list I have the most pages. I LOVE todo lists, they make me feel accomplished. And if I do anything not on my list? You got that right I write it on my list so I can mark it off. :) I'm an odd bird about todo lists, well about a lot of things actually. In my goal list I have the following:
Weekly & Monthly & Yearly Goals - Where we write down things we want to accomplish for that time period this is simple household todo list stuff
Next is a Weekly Goal sheet that is detailed and person oriented. On here I have it broken down for personal, family, business, marriage, faith and homemaking goals. I have a list & my husband has a list. This is anything but todo list stuff. They are personal and deep goals to in my mind help improve us as people, parents, and spouses.              
        After that we have Goals for each family memeber for 2013. For me and my husband theres a place to write goals for ourselves and places for us to write on each others list to say what we'd like the other person to work on. I believe an open line of communication can help us make fights and misunderstandments to a minimum and writing them down keeps the other person from forgetting or getting their feelings hurt. For the kids I write down things we want to teach them or make sure they see. For example on my 2 year olds I want him to start recognizing words like he does with his letters and numbers  and we need to work on potty training.            
        In this section I also have financial goals for the family and a hope list. The hope list is closely tied to our financial goals because the hope list is basically for us to write things we want to be able to afford this year. Things like a new tv or a new tattoo.  Things that aren't a necessity but that if we stick to our budget and save towards it then it would be a nice reward. Theres also a place to write household needs for things like items needing replacing like a bathmat or new coffee table, ect.
In the Event Planning section I have a page to plan out the detail of each boys birthday party including theme, location, date and cake and decoration ideas. I left places to paste pictures if I want to. I also have this section to write out other party plans if I'm in charge of any other get togethers through the year. My sister in law is big on family dinner night so if we are hosting family night then I'd write my plans in this section.
Immediately following that I have the calendar including a page with a year at a glance to write out important dates so I don't have to flip to each page to find Casey's birthday or whatever I'm looking for. 
And then end I have the emergency plan that I printed from here. I have it in the back because I won't need it each and every day but if its an emergency its easy to open the notebook backwards and its right there.
In the front pocket I have my weekly plan of attack which is a just AMAZING download that I got in an email. It allows me to plan out my todo list in an orderly fashion without overwhelming myself. It helps me keep the list small and manageable. If I can find the old email I'll attach the information because this should really be shared. Yes it's THAT good.

Now that I've wrote all this down it looks a smidge intimidating and makes me look fairly crazy for needing this much organization.
See you guys tomorrow!