When we knew the boys were getting their own rooms I knew I wanted to make it something to suit each personality. I also knew the move was going to be a difficult adjustment for my two year old who already had to adjust to having a baby brother enter the world and the loss of one of our dogs who had been there since his birth. So I knew it had to be something he could get excited about and I tried to let him help. So of course Pinterest is an amazing venue for searching for ideas, which I searched tirelessly until I found something that I felt suited him and was easy enough to be completed by my limited artistic ability.
| My 2 year old LOVES airplanes so his room was so much fun to design. I painted his room blue so that his walls could represent the sky. I set out several different blue colors and let him choose. I was once told that children need to be allowed to make choices but that as the parent you need to be happy with the choices we give them. So I made sure that I loved every color I sat in front of him because I didn't want to send a message that his choices aren't good enough. Too complex for a 2 year old? Probably but I wasn't taking the chance of hurting his feelings because it would be my luck he would remember the exact shade of blue he wanted. But I'm off topic. (of course) Once I knew the walls would be air I knew I had to incorporate airplanes on the wall some way. I saw several pins where people had painted airplanes on the walls. But guess who's not a professional painter/artist? This girl. :) BUT this pin was the answer to my prayers. Here's how I did it. You'll need a blank stencil (you can find this at Hobby Lobby or many other craft stores) An exacto knife (craft store) Paint--Since I'm painting it on the walls I wanted to use wall paint becuase I've watched acryllic paints crack with age and run when wet. I bought the new sample containers they have at home depot & lowes for about $2. This project cost me about $25 or so. That include the wall paint, the sample paint and the stencil sheets. My son loves all transportation so I found this awsome rug at Ikea and the road leads to all kinds of cute pictures including volcanoes & icebergs. He loves it & it help him actually learn :) And of course we have his fish tank. We let him participate if feeding & taking care of them so I'm hoping we are starting an early lesson on responsibility. :) | 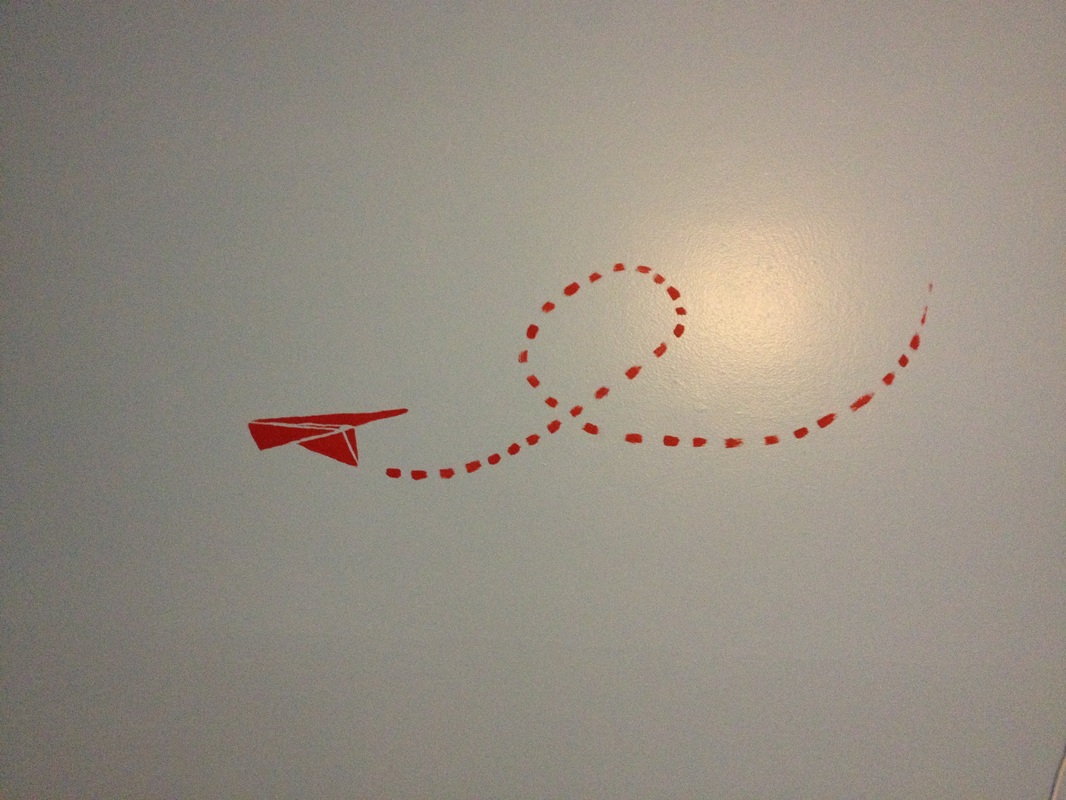 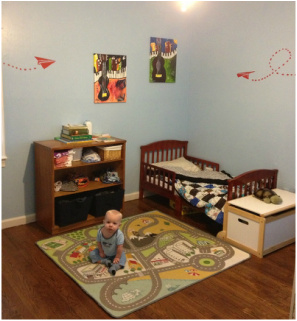 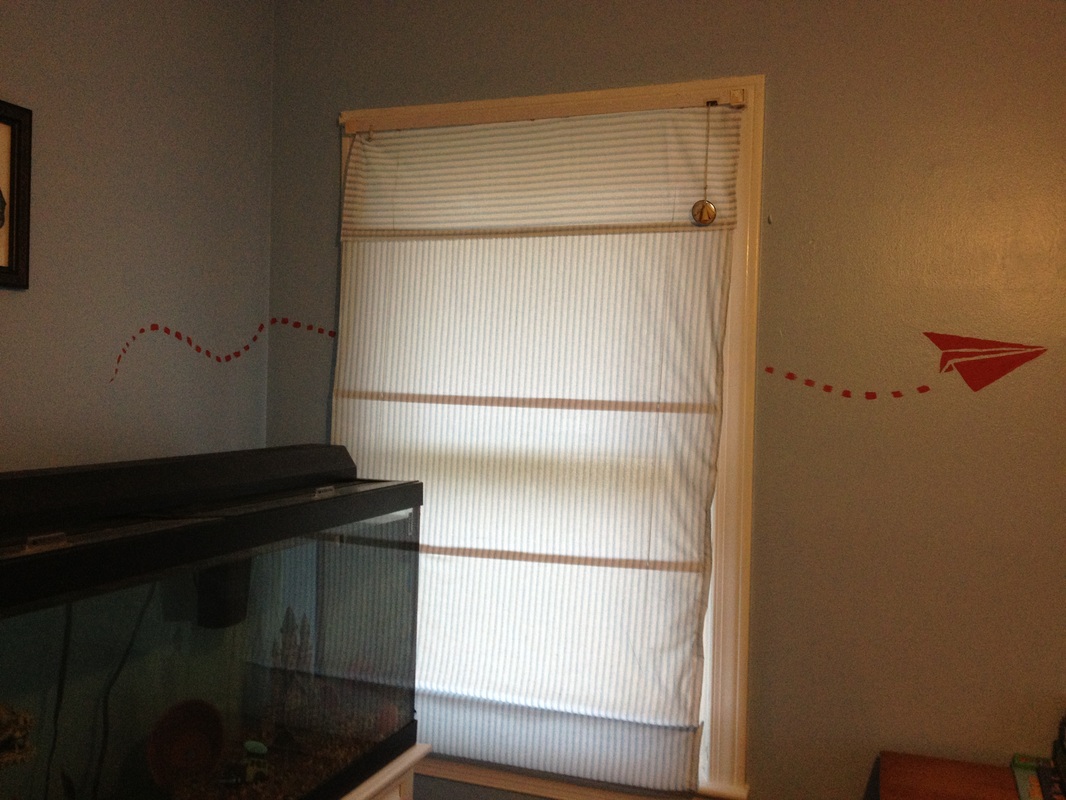 |
I traced out a paper airplane template I found online from a google search onto the blank 8x10 stencil page. I created 2 different stencils for this room so that the airplanes would look like they were flying if differnt directions instead of repeating the same one over and over. (I have issues with repetition)
Using your exacto knife cut out the pattern of the plane.
Once I was ready to paint the planes I secured the stencils on the wall with painters tape. I used one of those sponge paint brushes which was kind of messy I had to go back and touch up some of the lines. So I would recommend using a small crafting paint brush. I will take you longer to paint it likely requiring a few coats but it will save you time because you won't have to touch up anything. After the airplanes themselves were complete I hand drew on the smoke marks onto the wall to show the airplane's path. I tried to make the airplanes placement and smoke lines sugges that they came in his room through his windows. I also put one on the inside of his closet door. An idea I got from my neice Hannah. :)
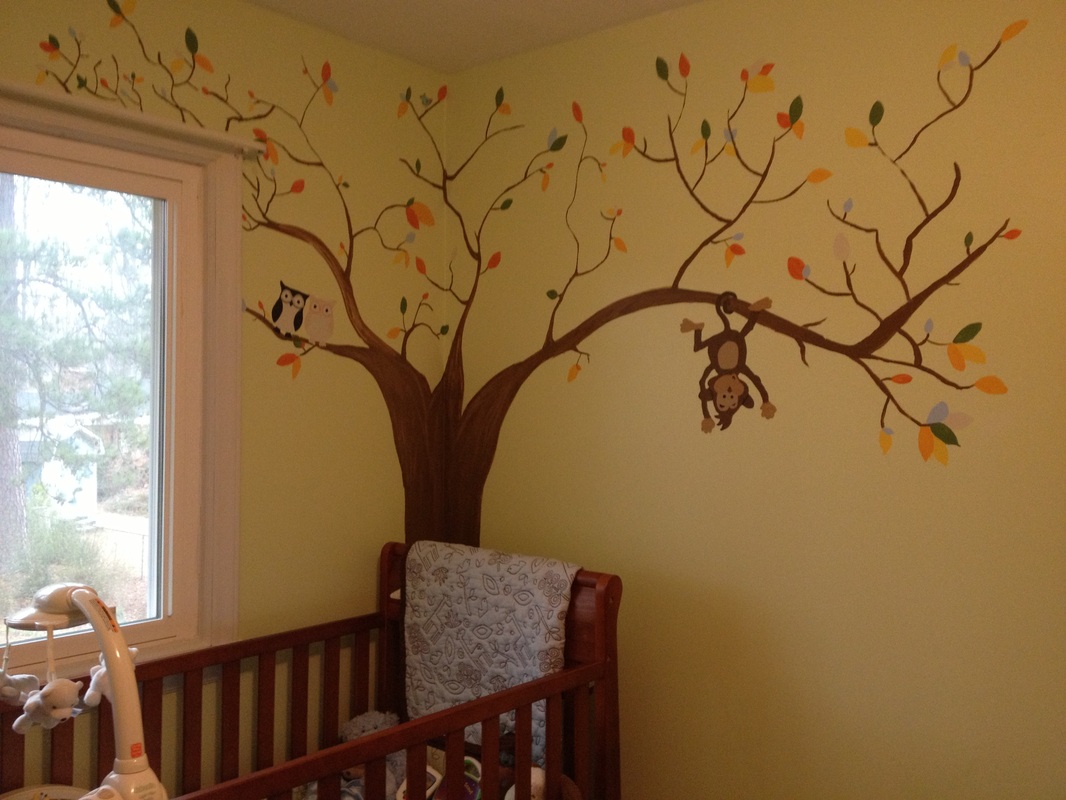 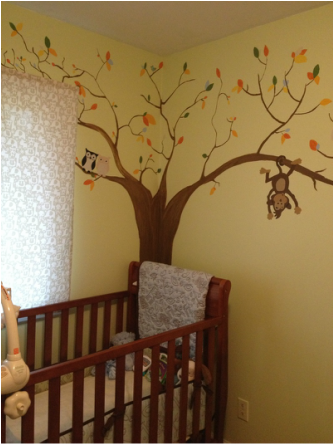 | My infant's room was easy to design because I already had his bedding and it was a jungle theme set that I found from the Gap. I really wanted to make sure I didn't have 2 blue rooms, just because they are boys doesn't mean that they both have to have blue rooms. So I picked the green from his bedding and make it a jungle themed room to match. Here's the pin I used to inspire me. For his room I had to enlist the help of my mom who is a GREAT artist. We worked together on the tree for his room because there was no way to make a stencil of this magnitude. So we drew the base of the tree with a pencil before we began painting. I had to get a few different color sample paints for this project. Several for the leaves and the monkey. The other colors I created by mixing things together. Once we had the basic design of the tree limbs painted we began placing on the twigs that would connect to the leaves we haven't painted yet. Then we each took a color and began painting leaves randomly. We were very careful to make sure that left places for the animals to be placed. To make the monkey and the owls I printed out a picture of each and cut it out. I traced it into the place it belonged on the tree. Once it was traced on I painted in the details with the proper colors. There is also a blue bird in the very top of the tree but I hand drew that. I also made his curtains from this really cute tan and cream colored patterned fabric I got from Joanns onsale. (They always have coupons and amazing sales.) |
 RSS Feed